Intermediates
A stripped back version of the full Seniors playbook for use with the Intermediates.
Table of Contents
Attack
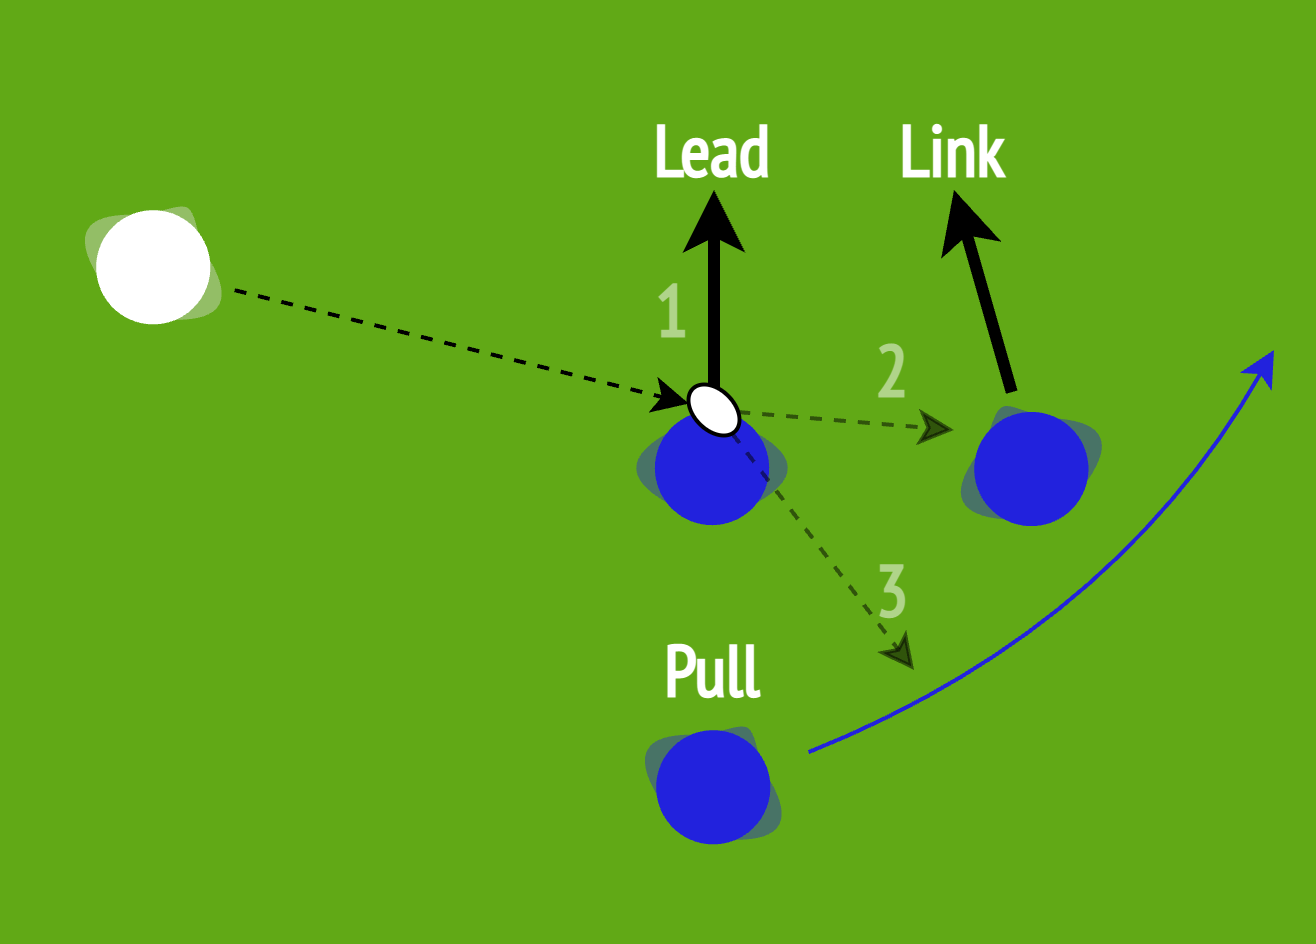
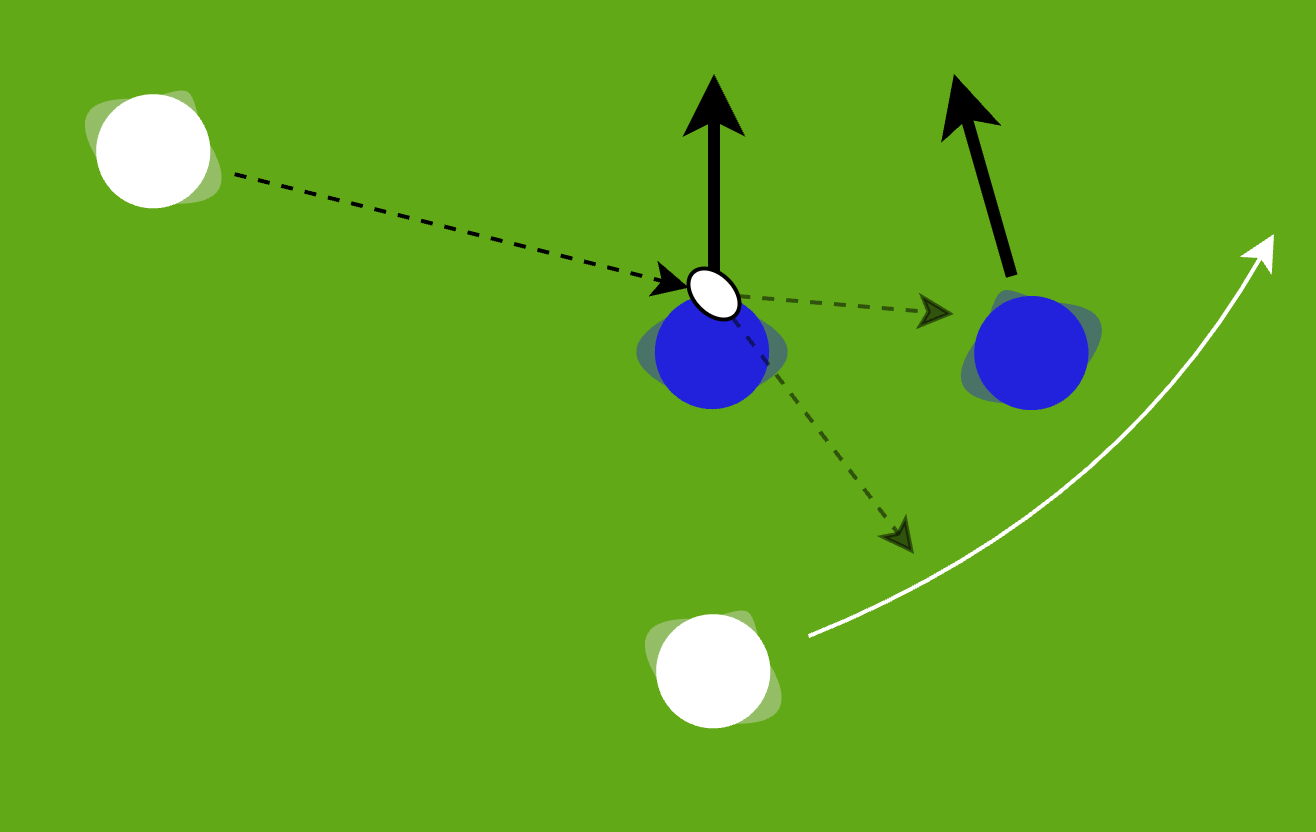
Pod structure
Each forward pod consists of 3 players in an L shape:
- “Lead” looks to take the ball off 9 or 10 and carry
- “Link” is close on his outside to support the carry or take a flat tip pass
- “Pull” sits behind “Lead” tracking across to support either ball carrier or to take a pull back pass
Backs joining pods
In the 3-3-2 structure, one pod only has two forwards, so a back needs to fill the “Pull” role, supporting the forward ball carriers, or being released down the wing.
There is no longer a “Captain of Play” expected behind every pod, allowing the backs more freedom.
A back can still step into that role and call “Take off” for the ball to be passed behind the advancing pod for the backs to go wide.
Pod plays
Pods can be placed in different areas of the field relative to the previous ruck as below:
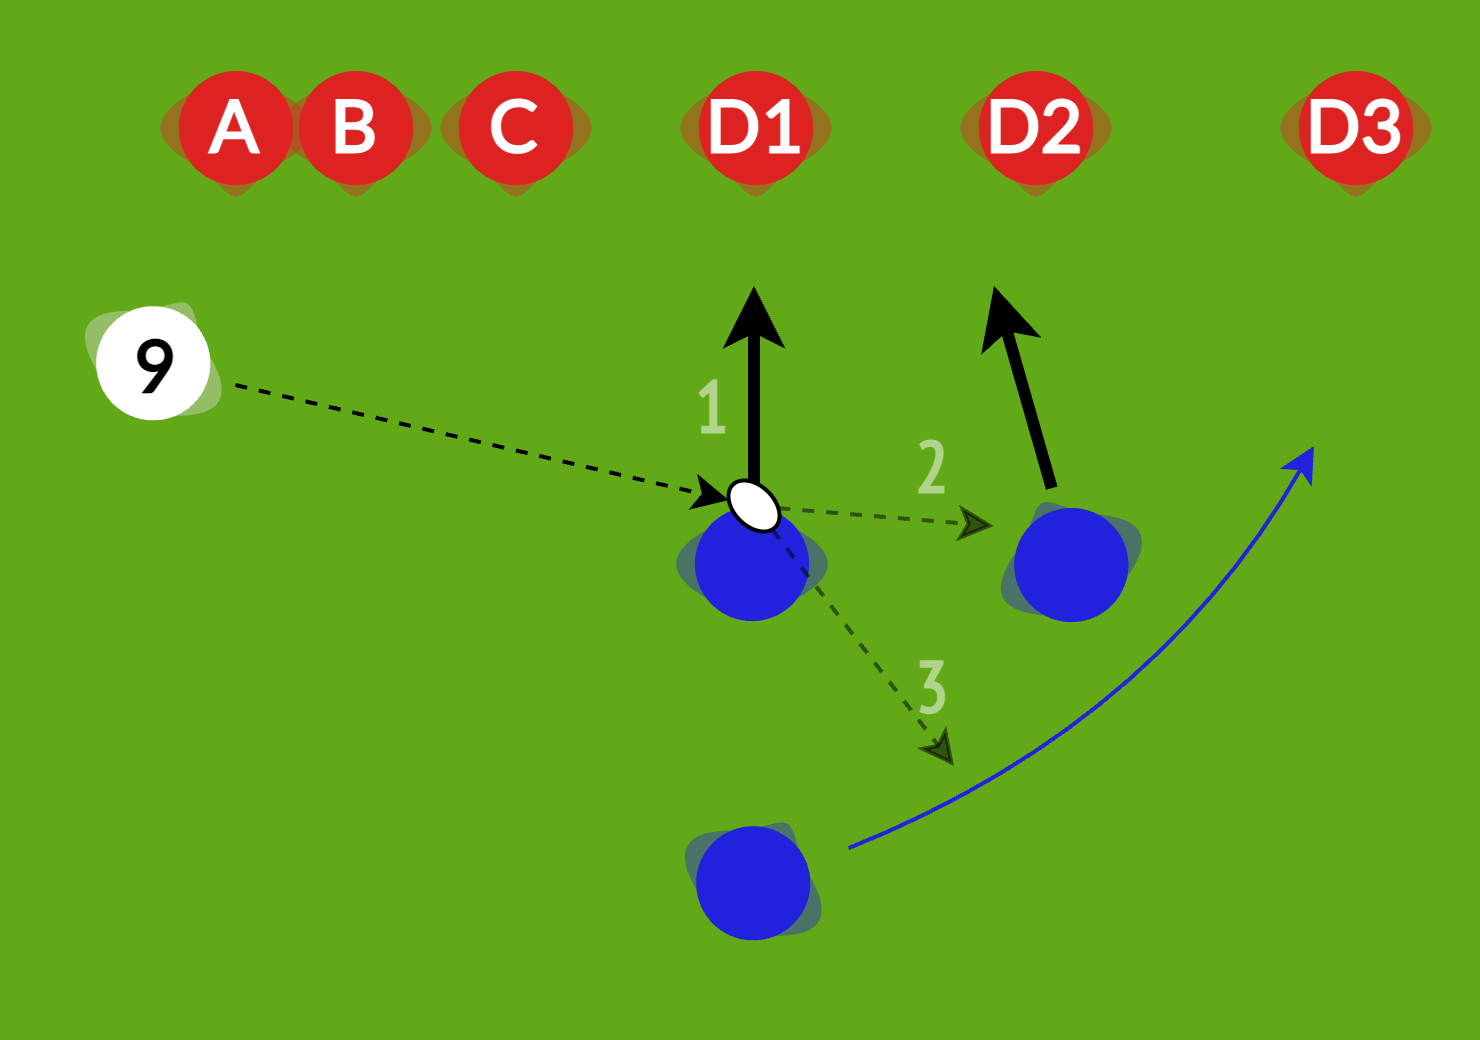
King - pod off 9
Lead takes the ball at pace off 9, aiming outside the C defender.
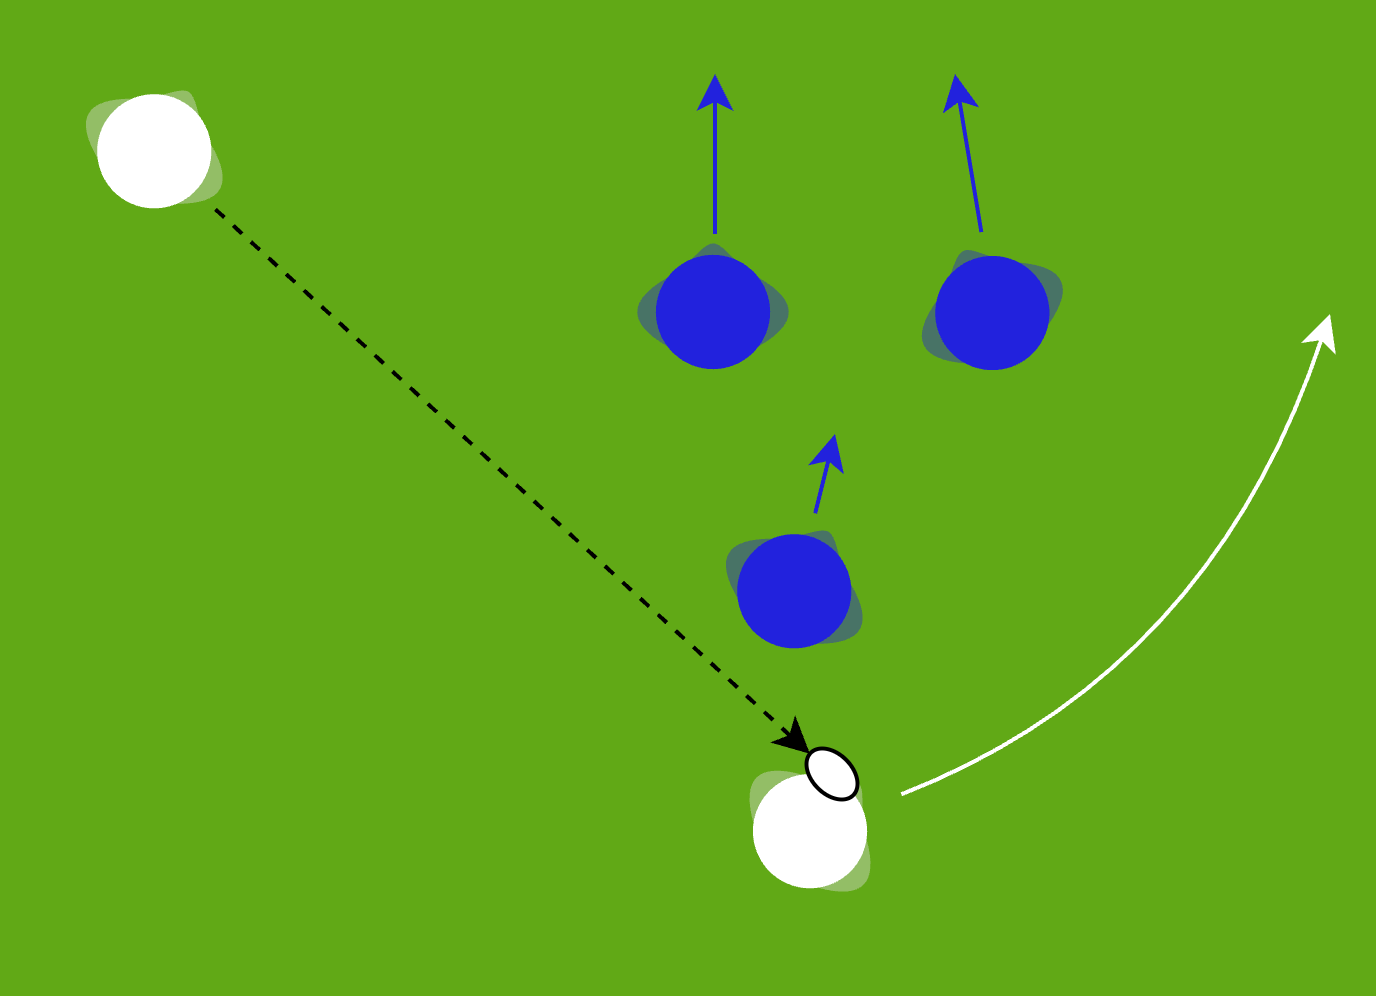
Queen - pod off 10
Identical shape as a King but set deeper and wider, receiving the ball from 10 and looking to find a gap in the defence, choosing from one of the above options.

Backs Moves
🏴 Scotland
(formerly “Box 1“)
- 12 runs an out-to-in line
- Blind side winger sits behind 10 before running wide, taking the ball behind 12
- 10 picks the pass to put one of them through a gap

Option 1 - short to 12
Option 2 - behind to the winger

🏴 Wales
(formerly “Blocker“)
- 12 and 13 start off roughly level with each other outside 10
- 13 runs a short line with 12 running wide out the back
- Blind side winger supports the ball carrier
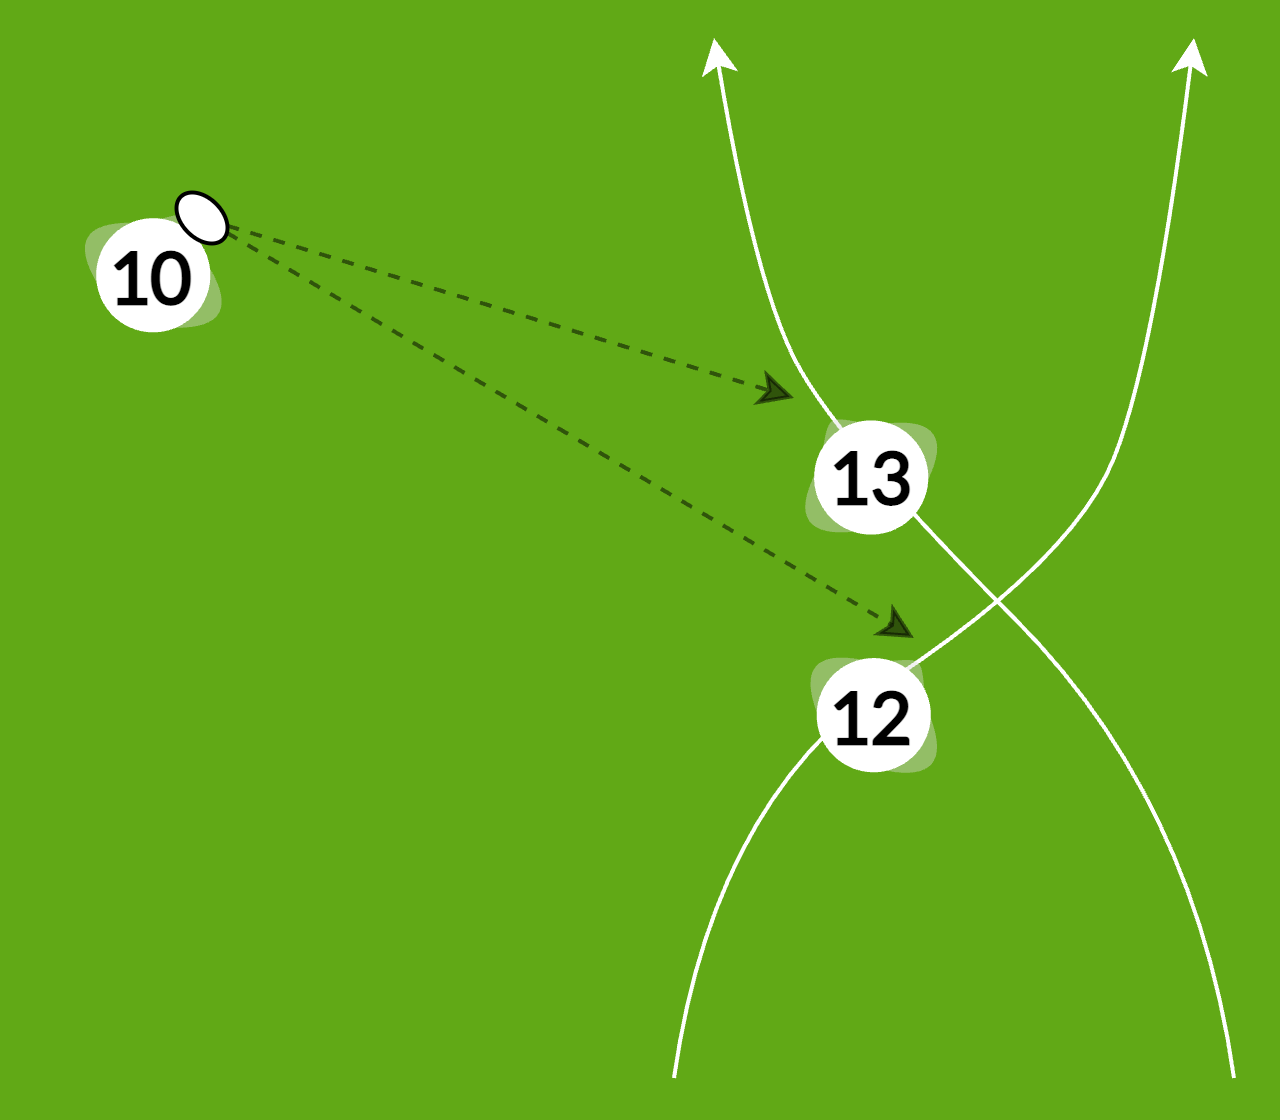
Option 1 - short to 13
Option 2 - behind to the 12

🇮🇹 Italy
(formerly “Box 2“)
The same as Scotland but wider in the back line, with 12 as the playmaker
- 13 runs an out-to-in line; winger runs behind 12 to 13
- 12 picks the pass to put one of them through a gap
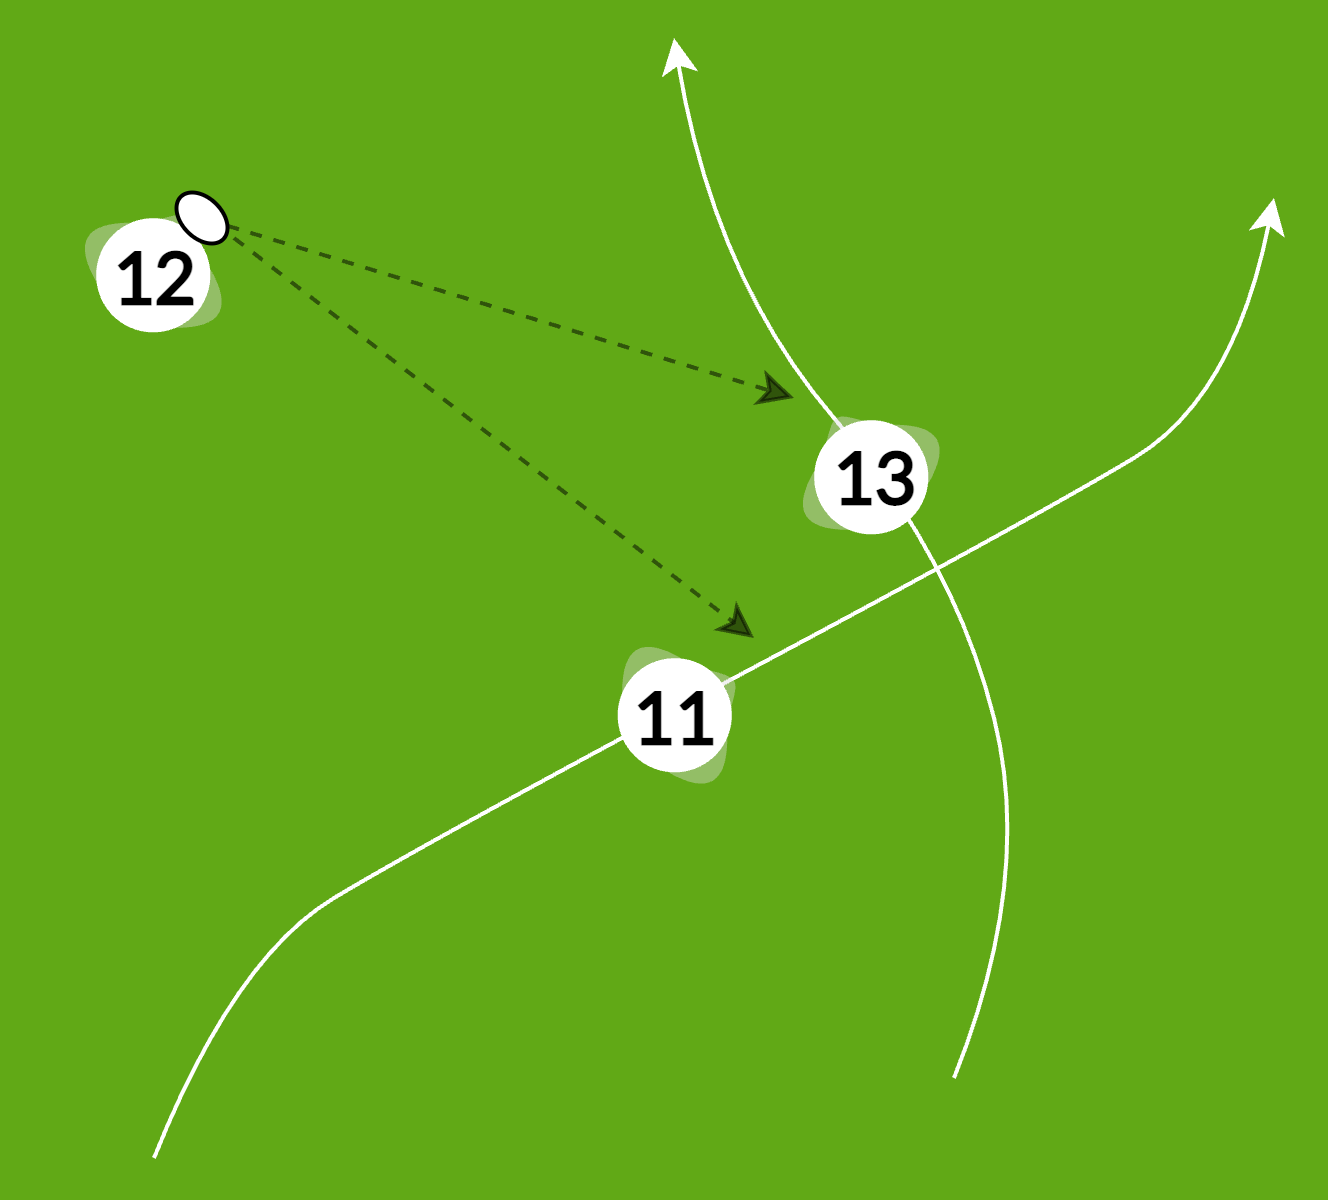
Option 1 - short to 13
Option 2 - behind to the winger
Defence
Defensive line
Priority is to secure the A/B/C positions. The 9 can sweep behind the ruck to organise, while the open side winger joins as the 13th defender, with the other winger and 15 dropping deep.
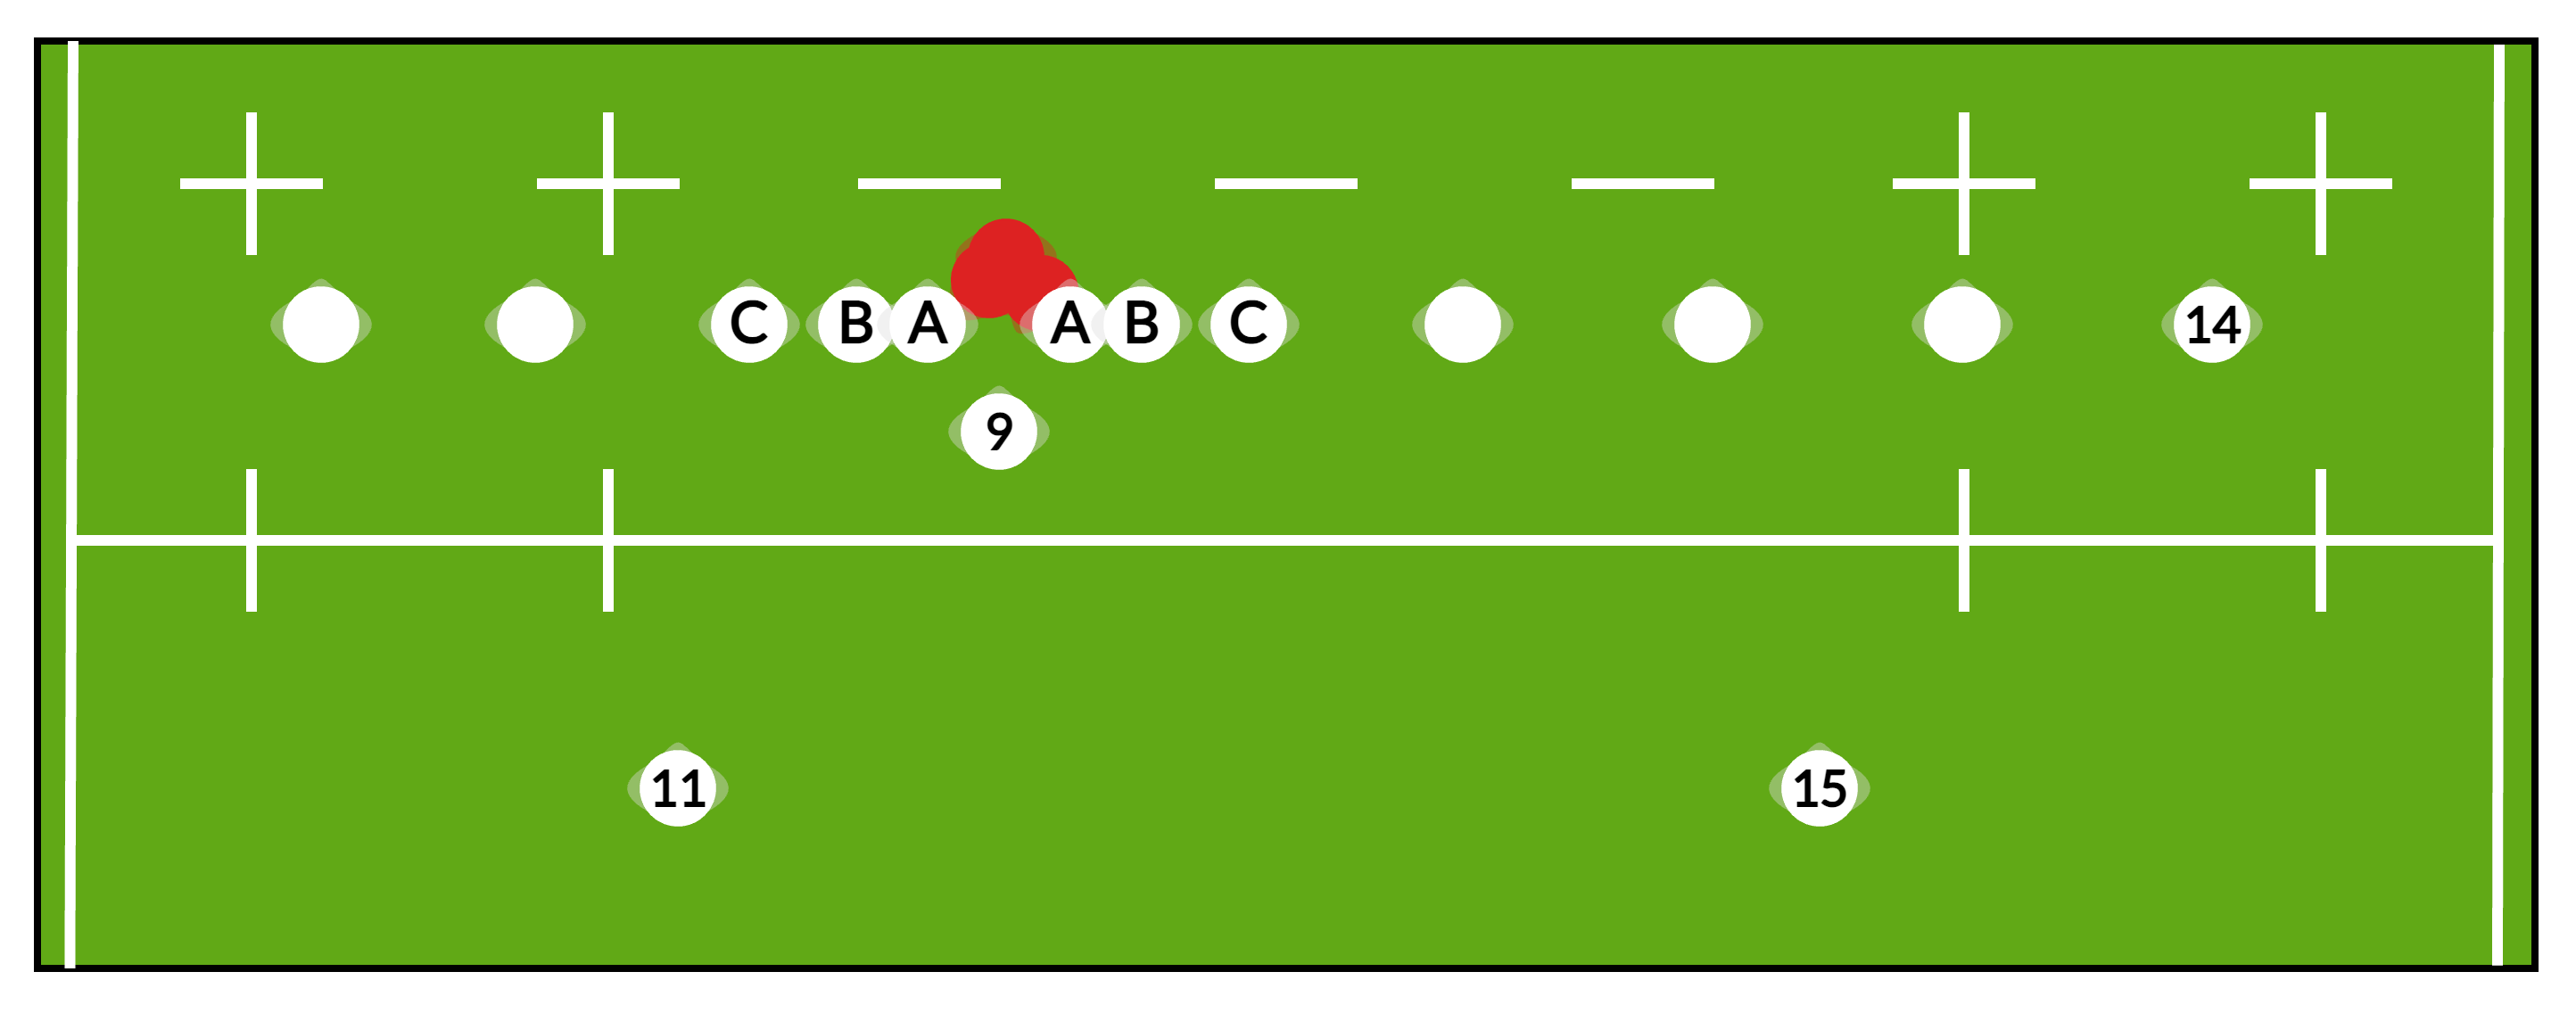
Our defensive will be speed off the line and communicated from the inside man.
| Starting Position | inside your opposite player |
| A-B-C | A is Post, B is the link man and C is inside first defender |
| Check, Move | Look across the defensive line and go forward |
| Push | Inside man has the player and you can focus on next player outside of the ball |
| Concede | Drift defence where we are short of players and concede ground until numbers are on our side |
Tackle Language
| Approach | Adjust your position and approach to increase the opportunity of a successful tackle |
| Contact | Make a positive initial contact with opponent ensuring transfer throughout the tackle. |
| Decision | Get Back-in-Game or attack breakdown. |
Breakdown Language
| Look | Understand what has happened in the tackle around you, to determine your next action |
| Threat | Shut down the space with the opposition and win the battle for height. |
| Contact | Body position to secure or clear out defender. |
| Decision | Get Back-in-Game. |