Attack
Table of Contents
This section covers our setup, how we call the throw and any movements in the lineout, and then how we play the ball away from the lineout.
Formations NEW
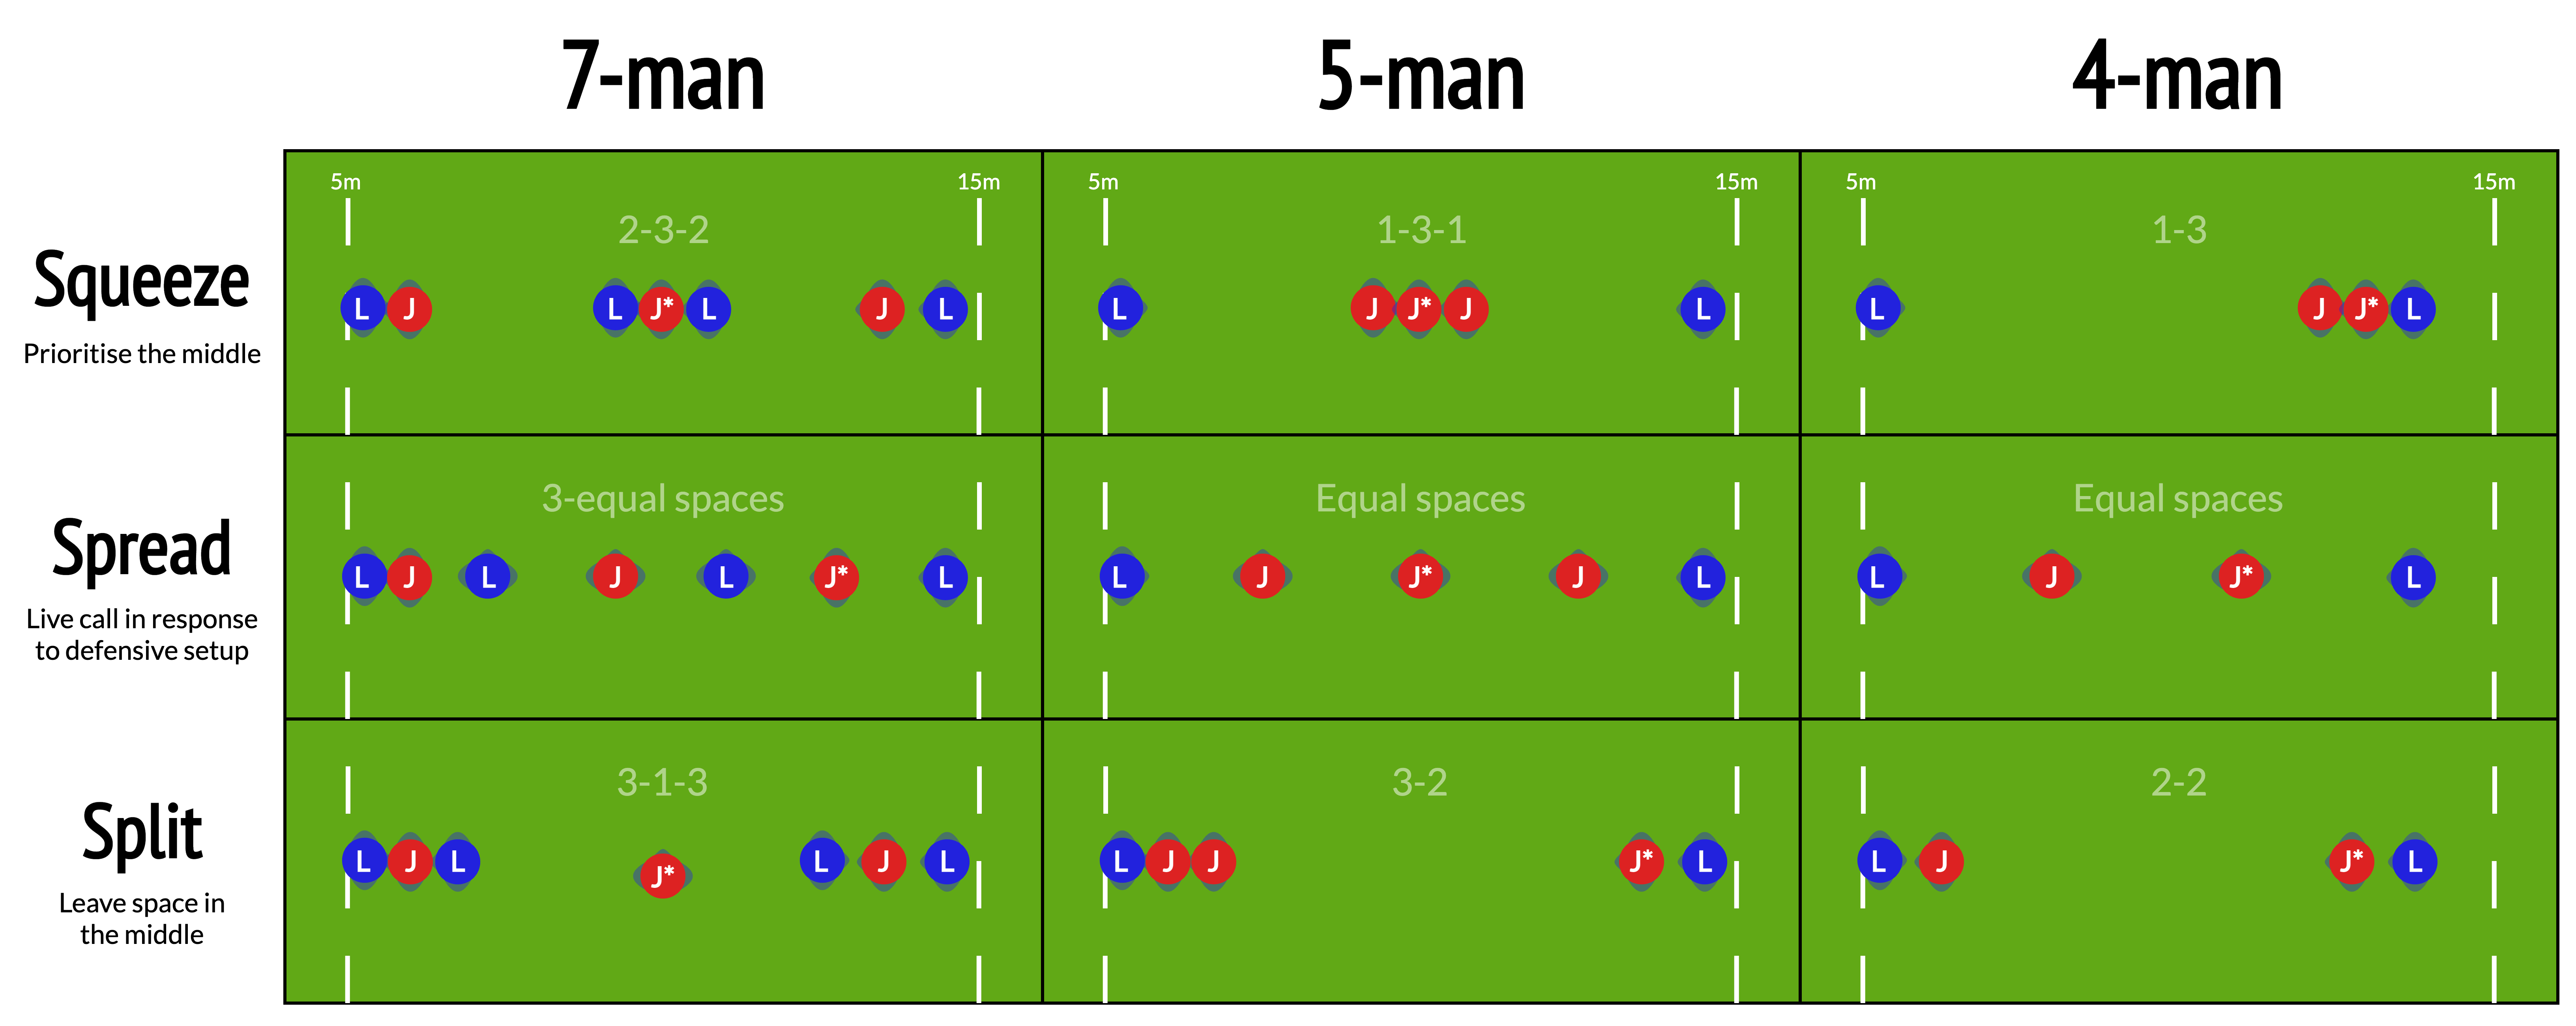
We run a 5-man lineout by default, but also 7-man and 4-man lineout variations. Each of these can be set up with many different formations (e.g. 1-3-2-1 or 1-1-3) so we need to keep things simple, but flexible.
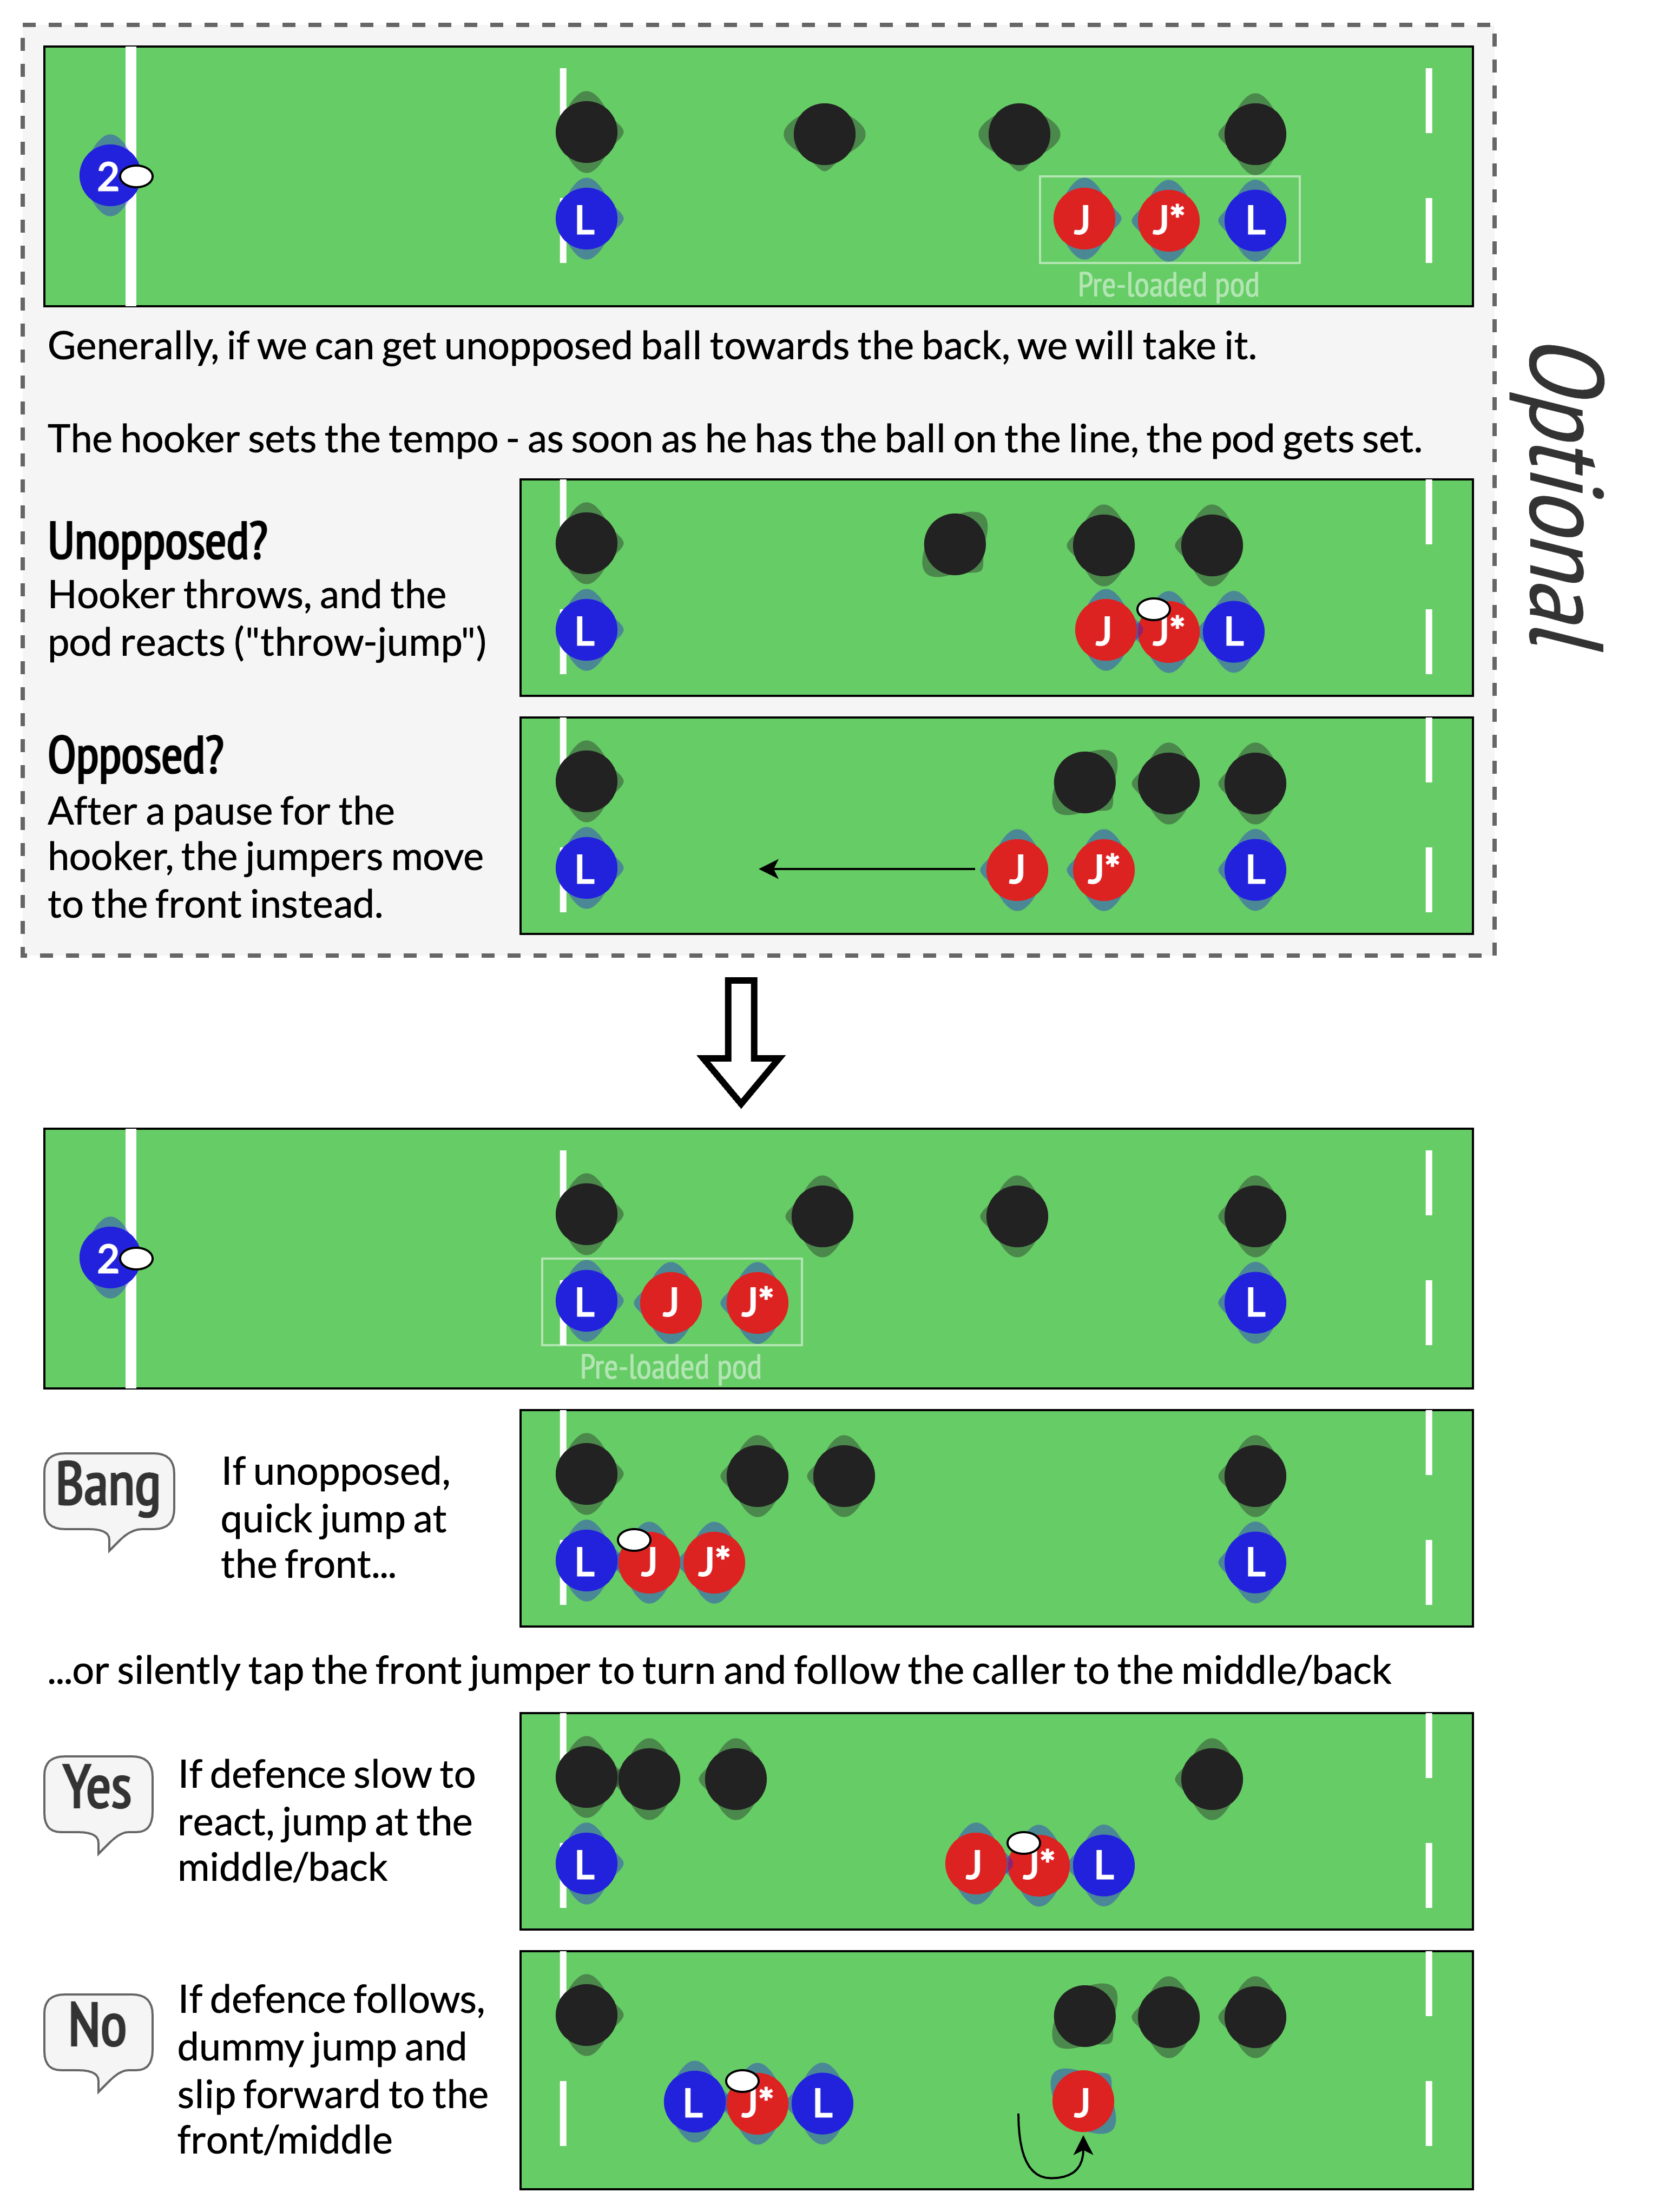
| Squeeze | A pre-set middle pod1 is ready for a quick “Bang” or to draw in the defence before moving. Default setup |
| Spread | Evenly spaced, keeping the defence guessing so we can attack weak spots or win with speed. |
| Split | Pods at front and back create space in the middle for movement or quick delivery. |
Calls NEW
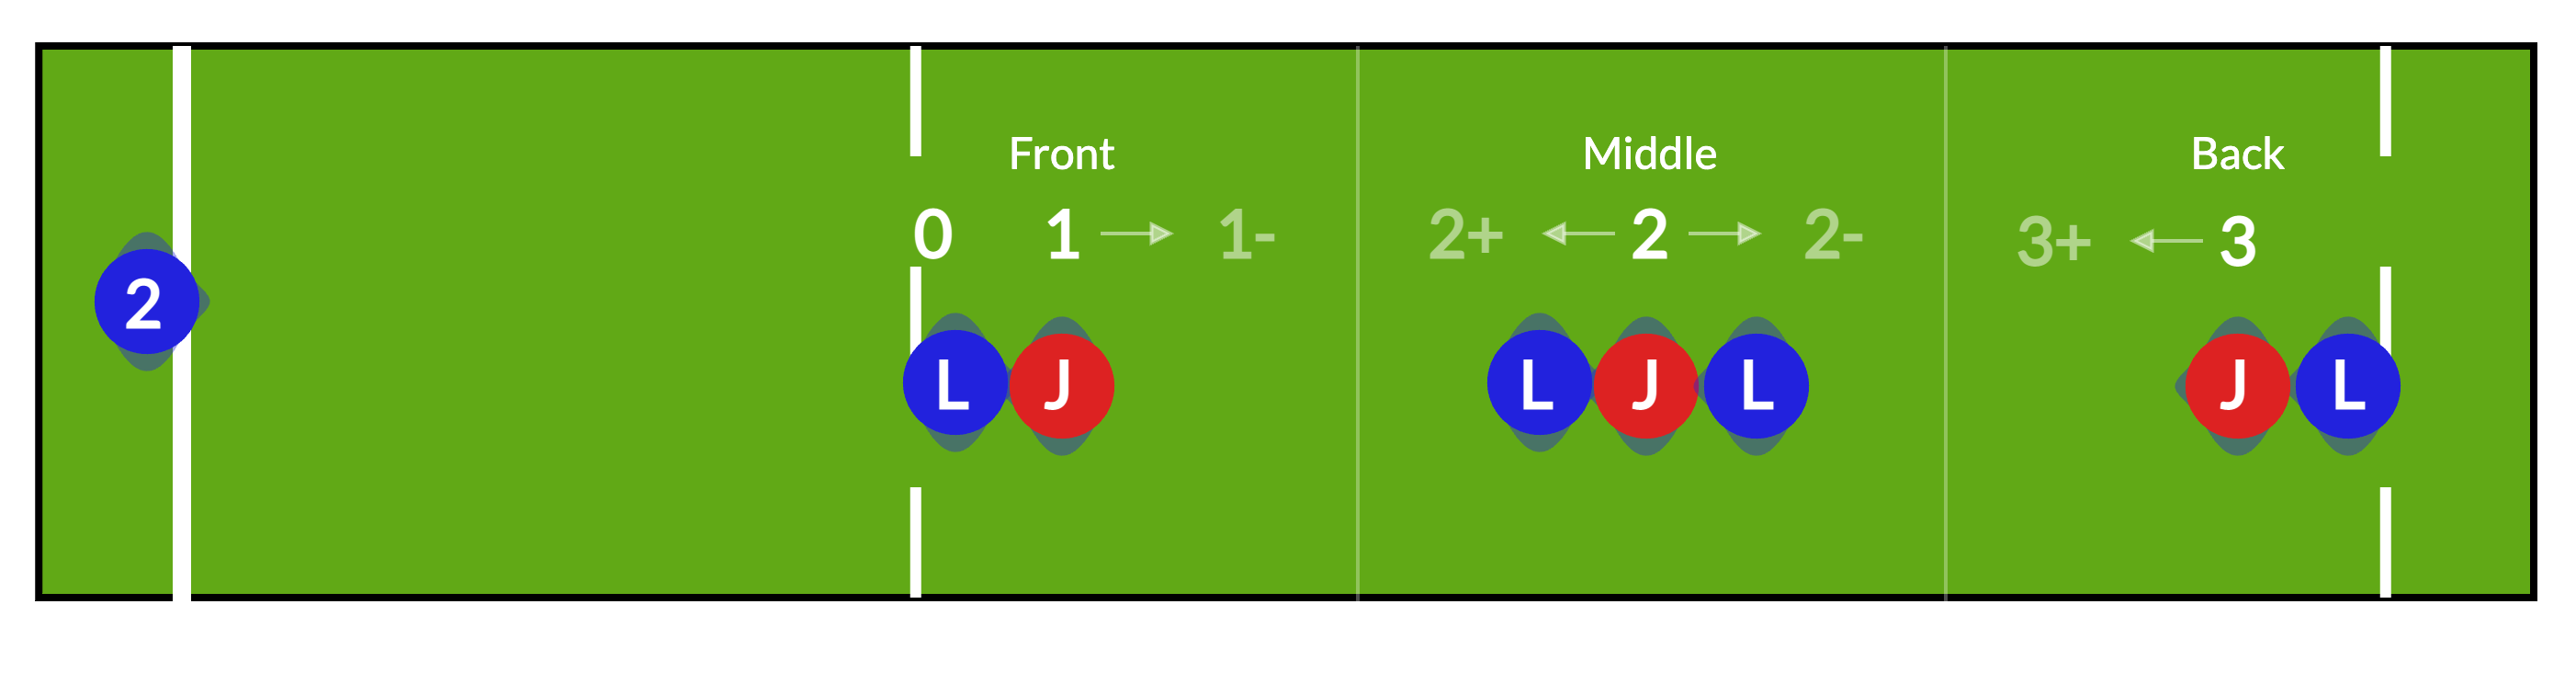
We divide the lineout into 3 zones (1, 2, 3), each with a jumper, or 0 for the very front with no jump (i.e. “Matlow”).
Example
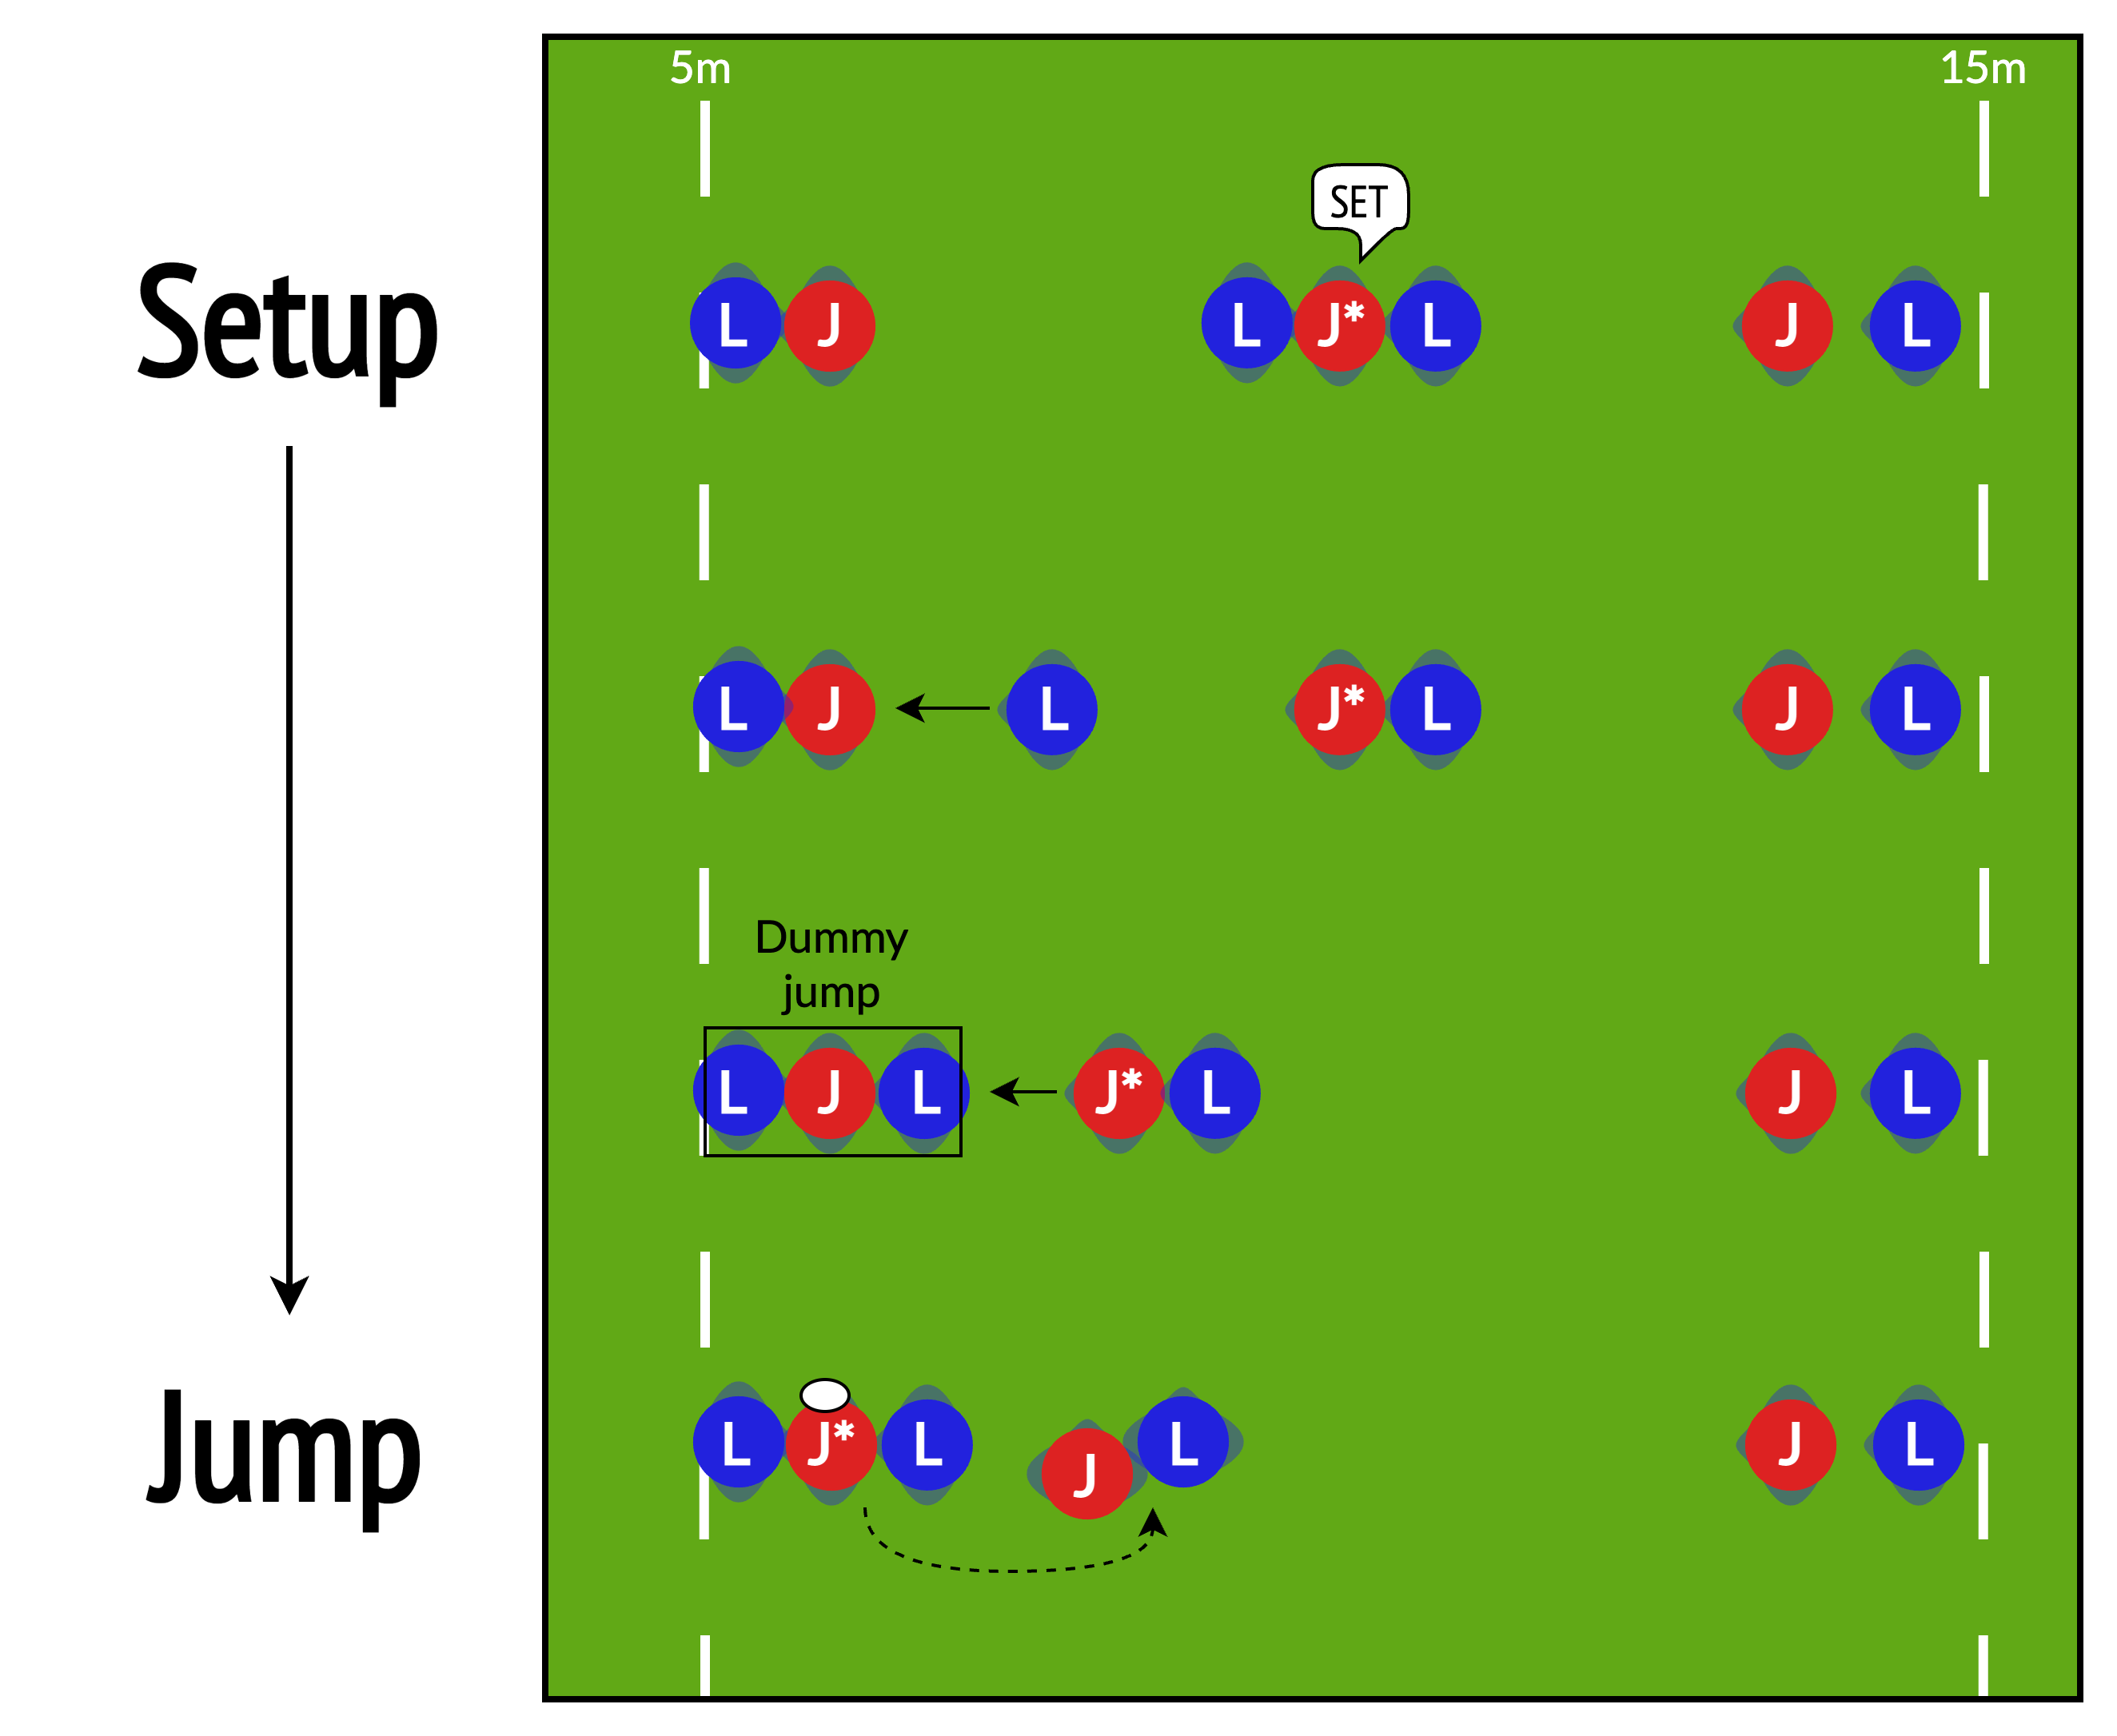
“7-man Squeeze 3”
Initial 2-3-2 formation. Throw to the back (3) on “Set”. Throw to the middle pod on “Bang”.
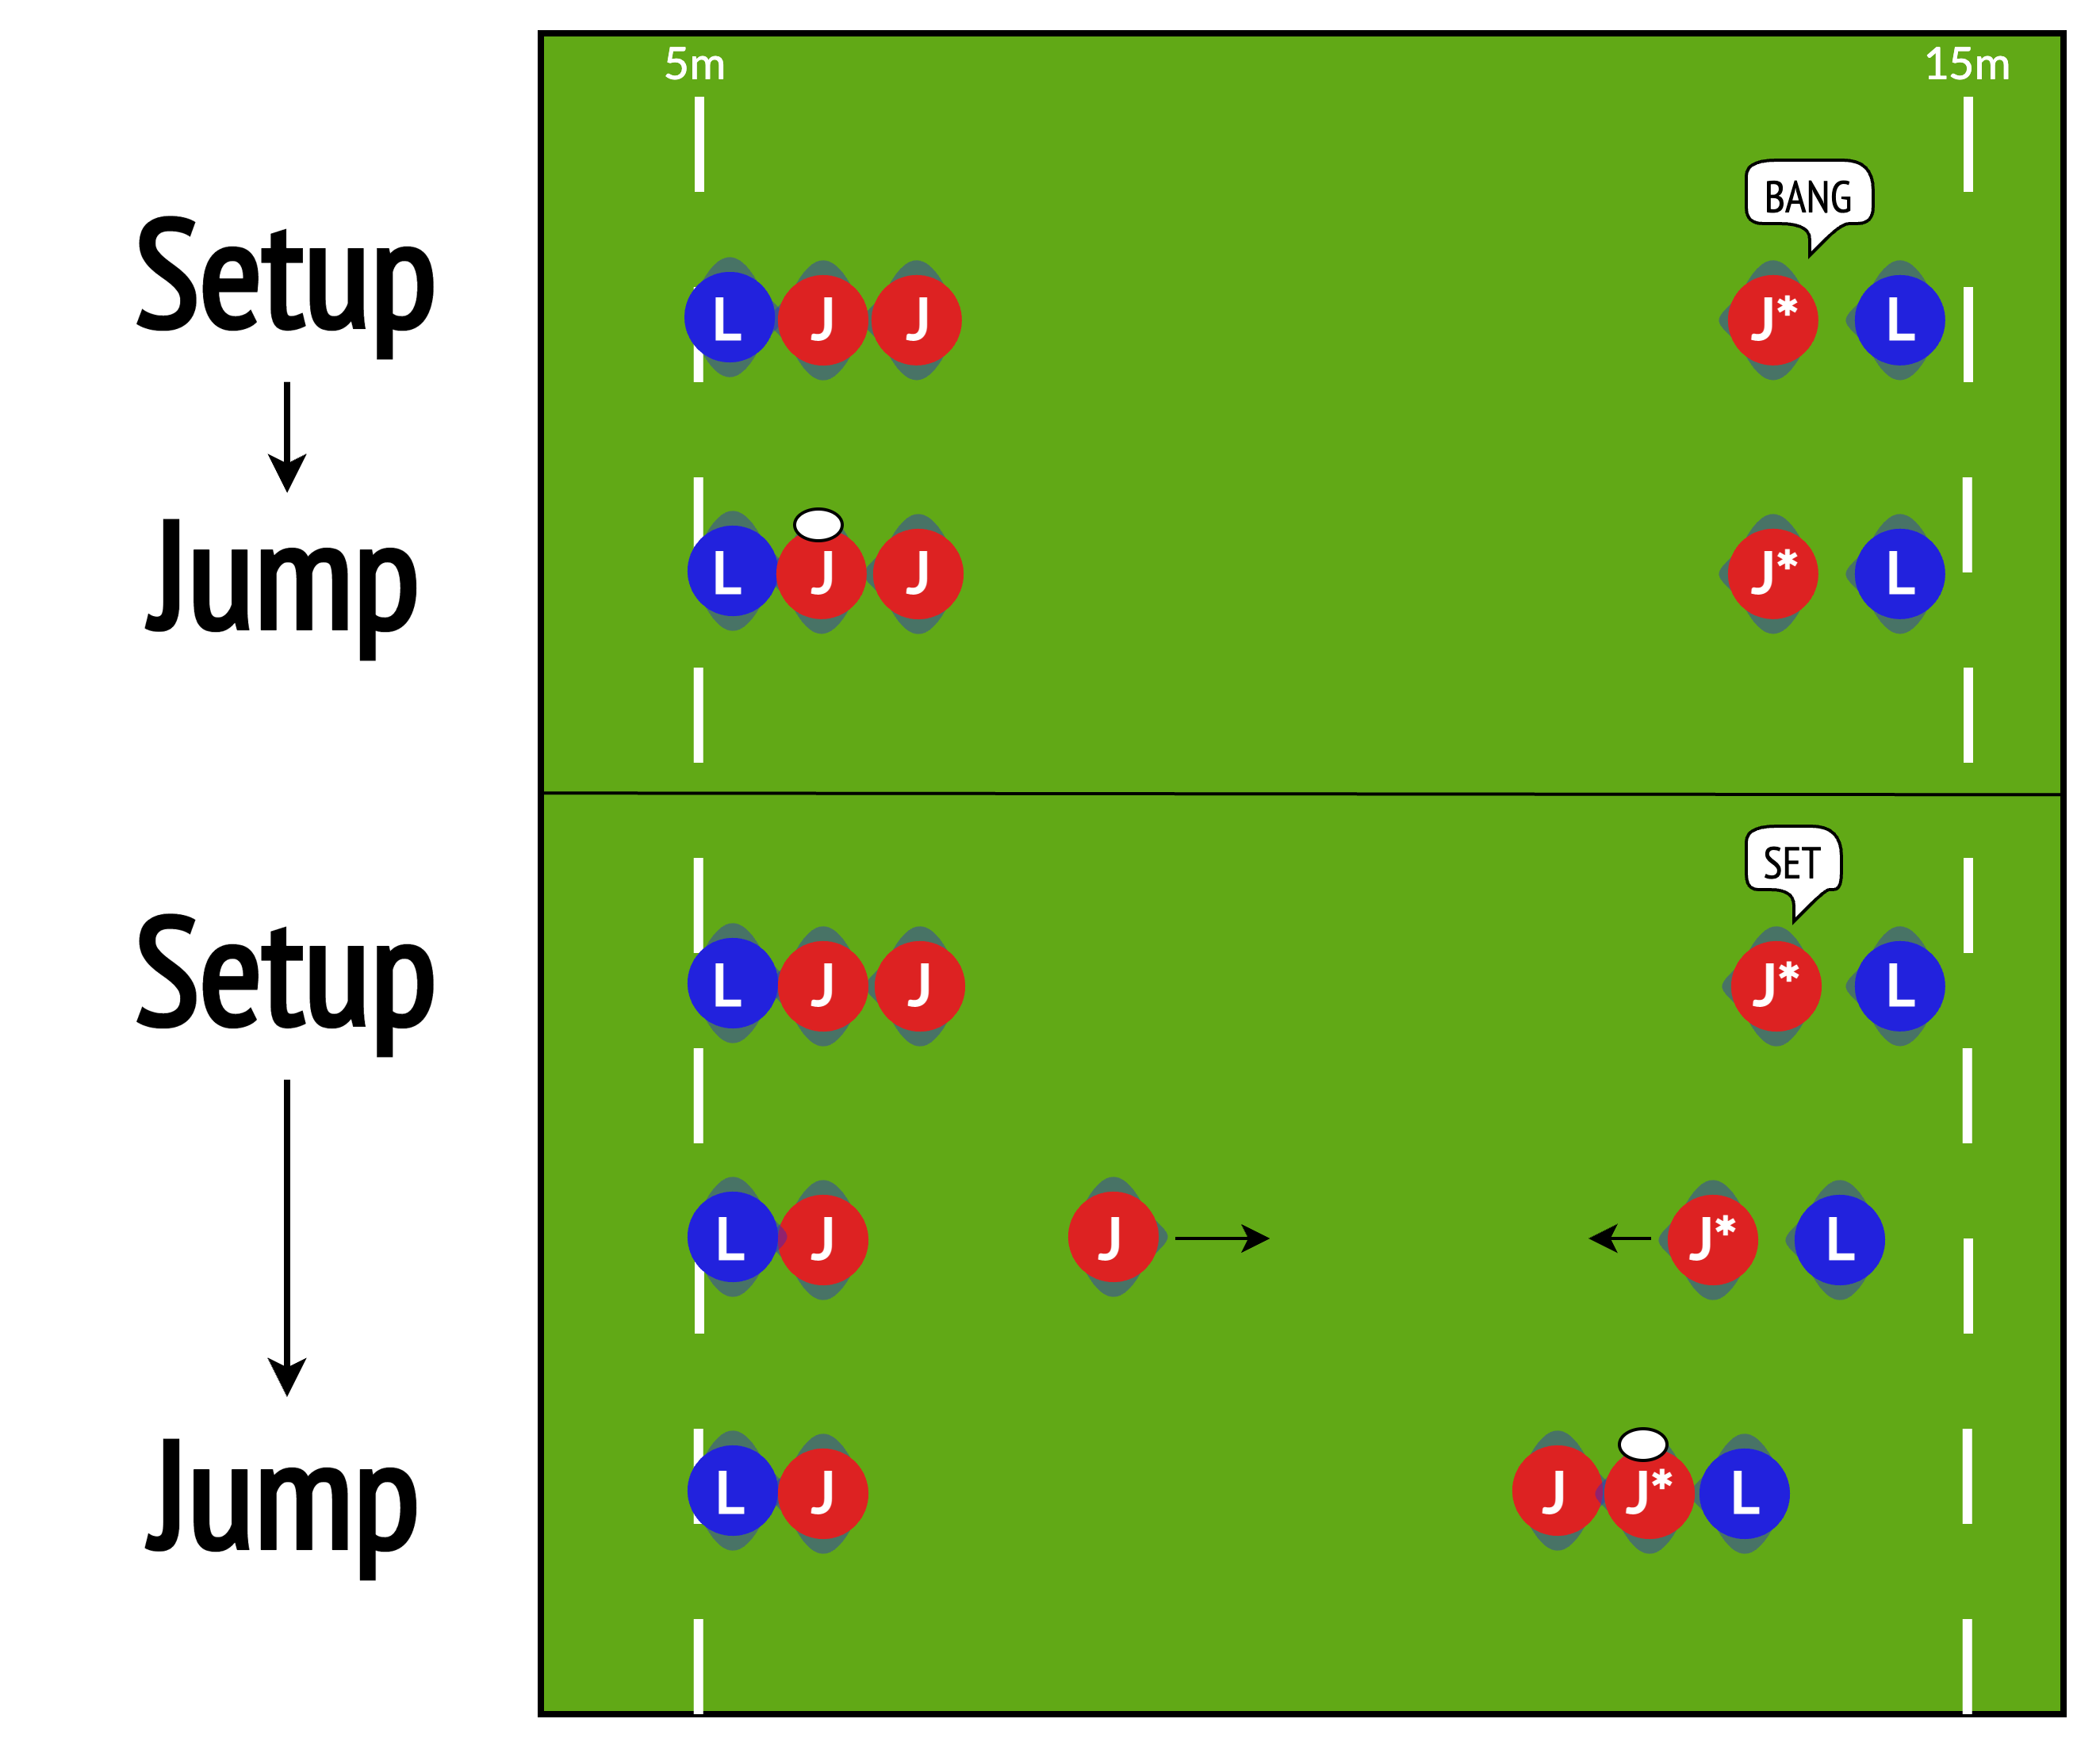
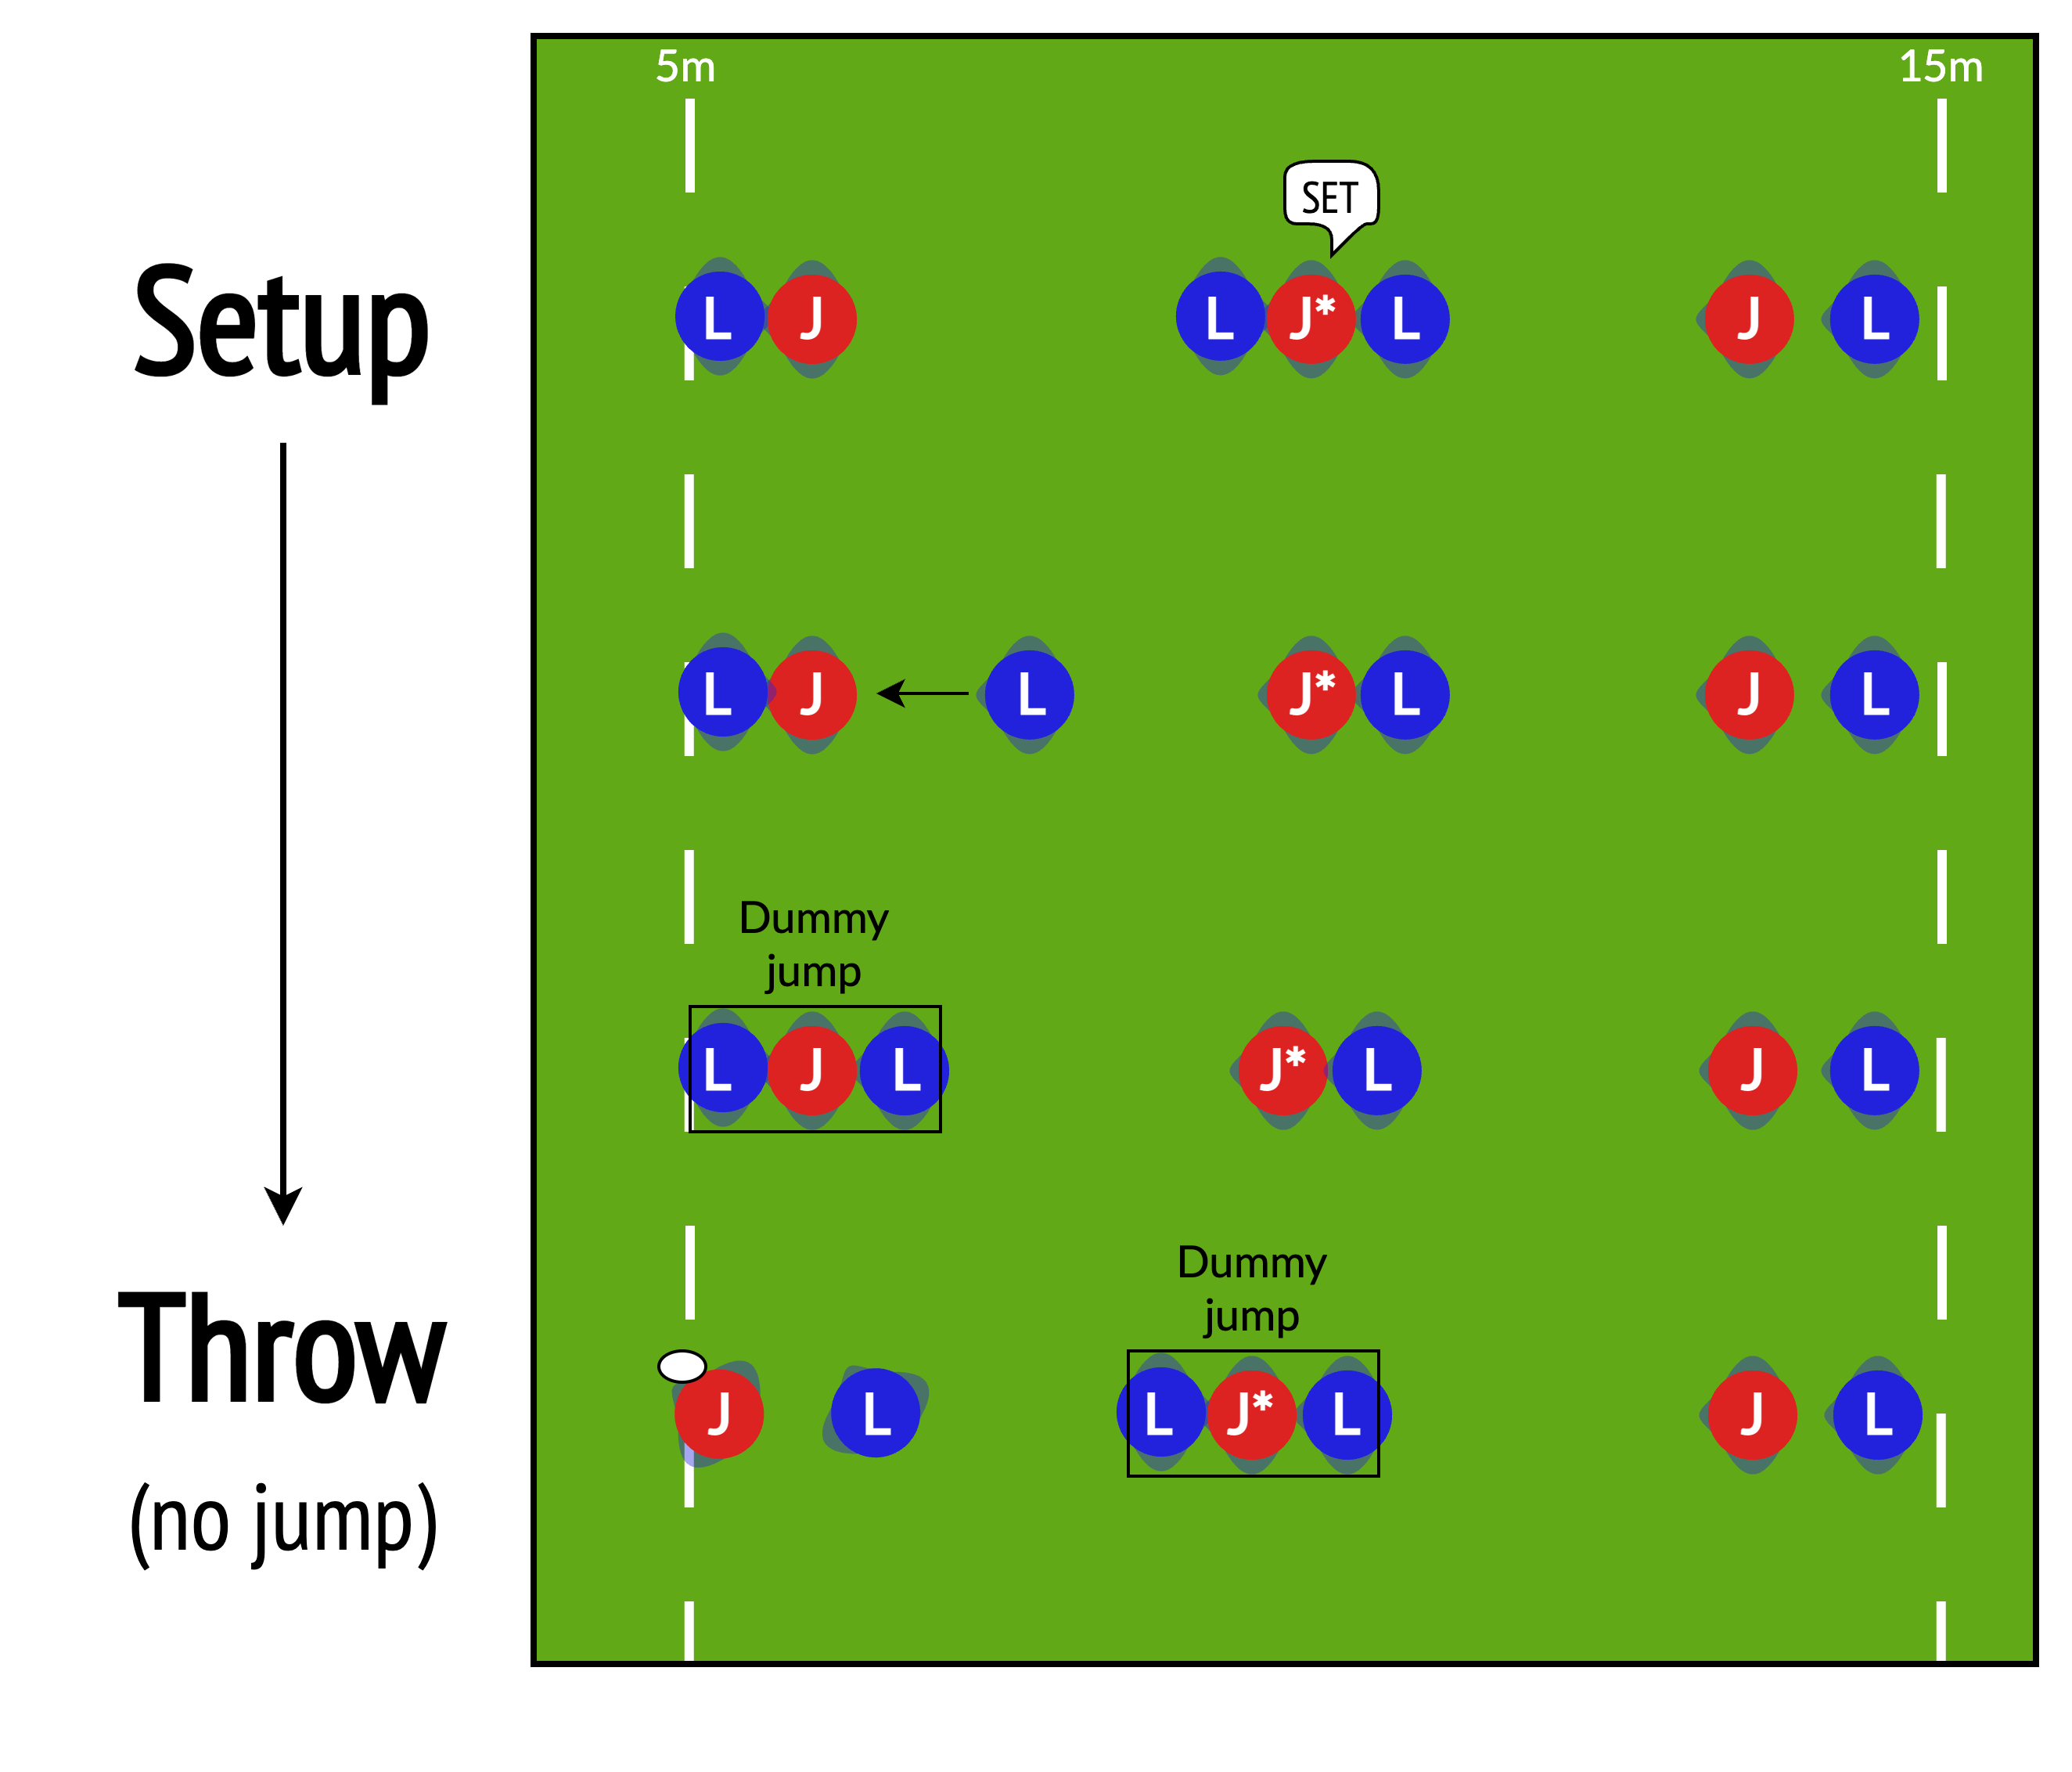
Dummy jumps
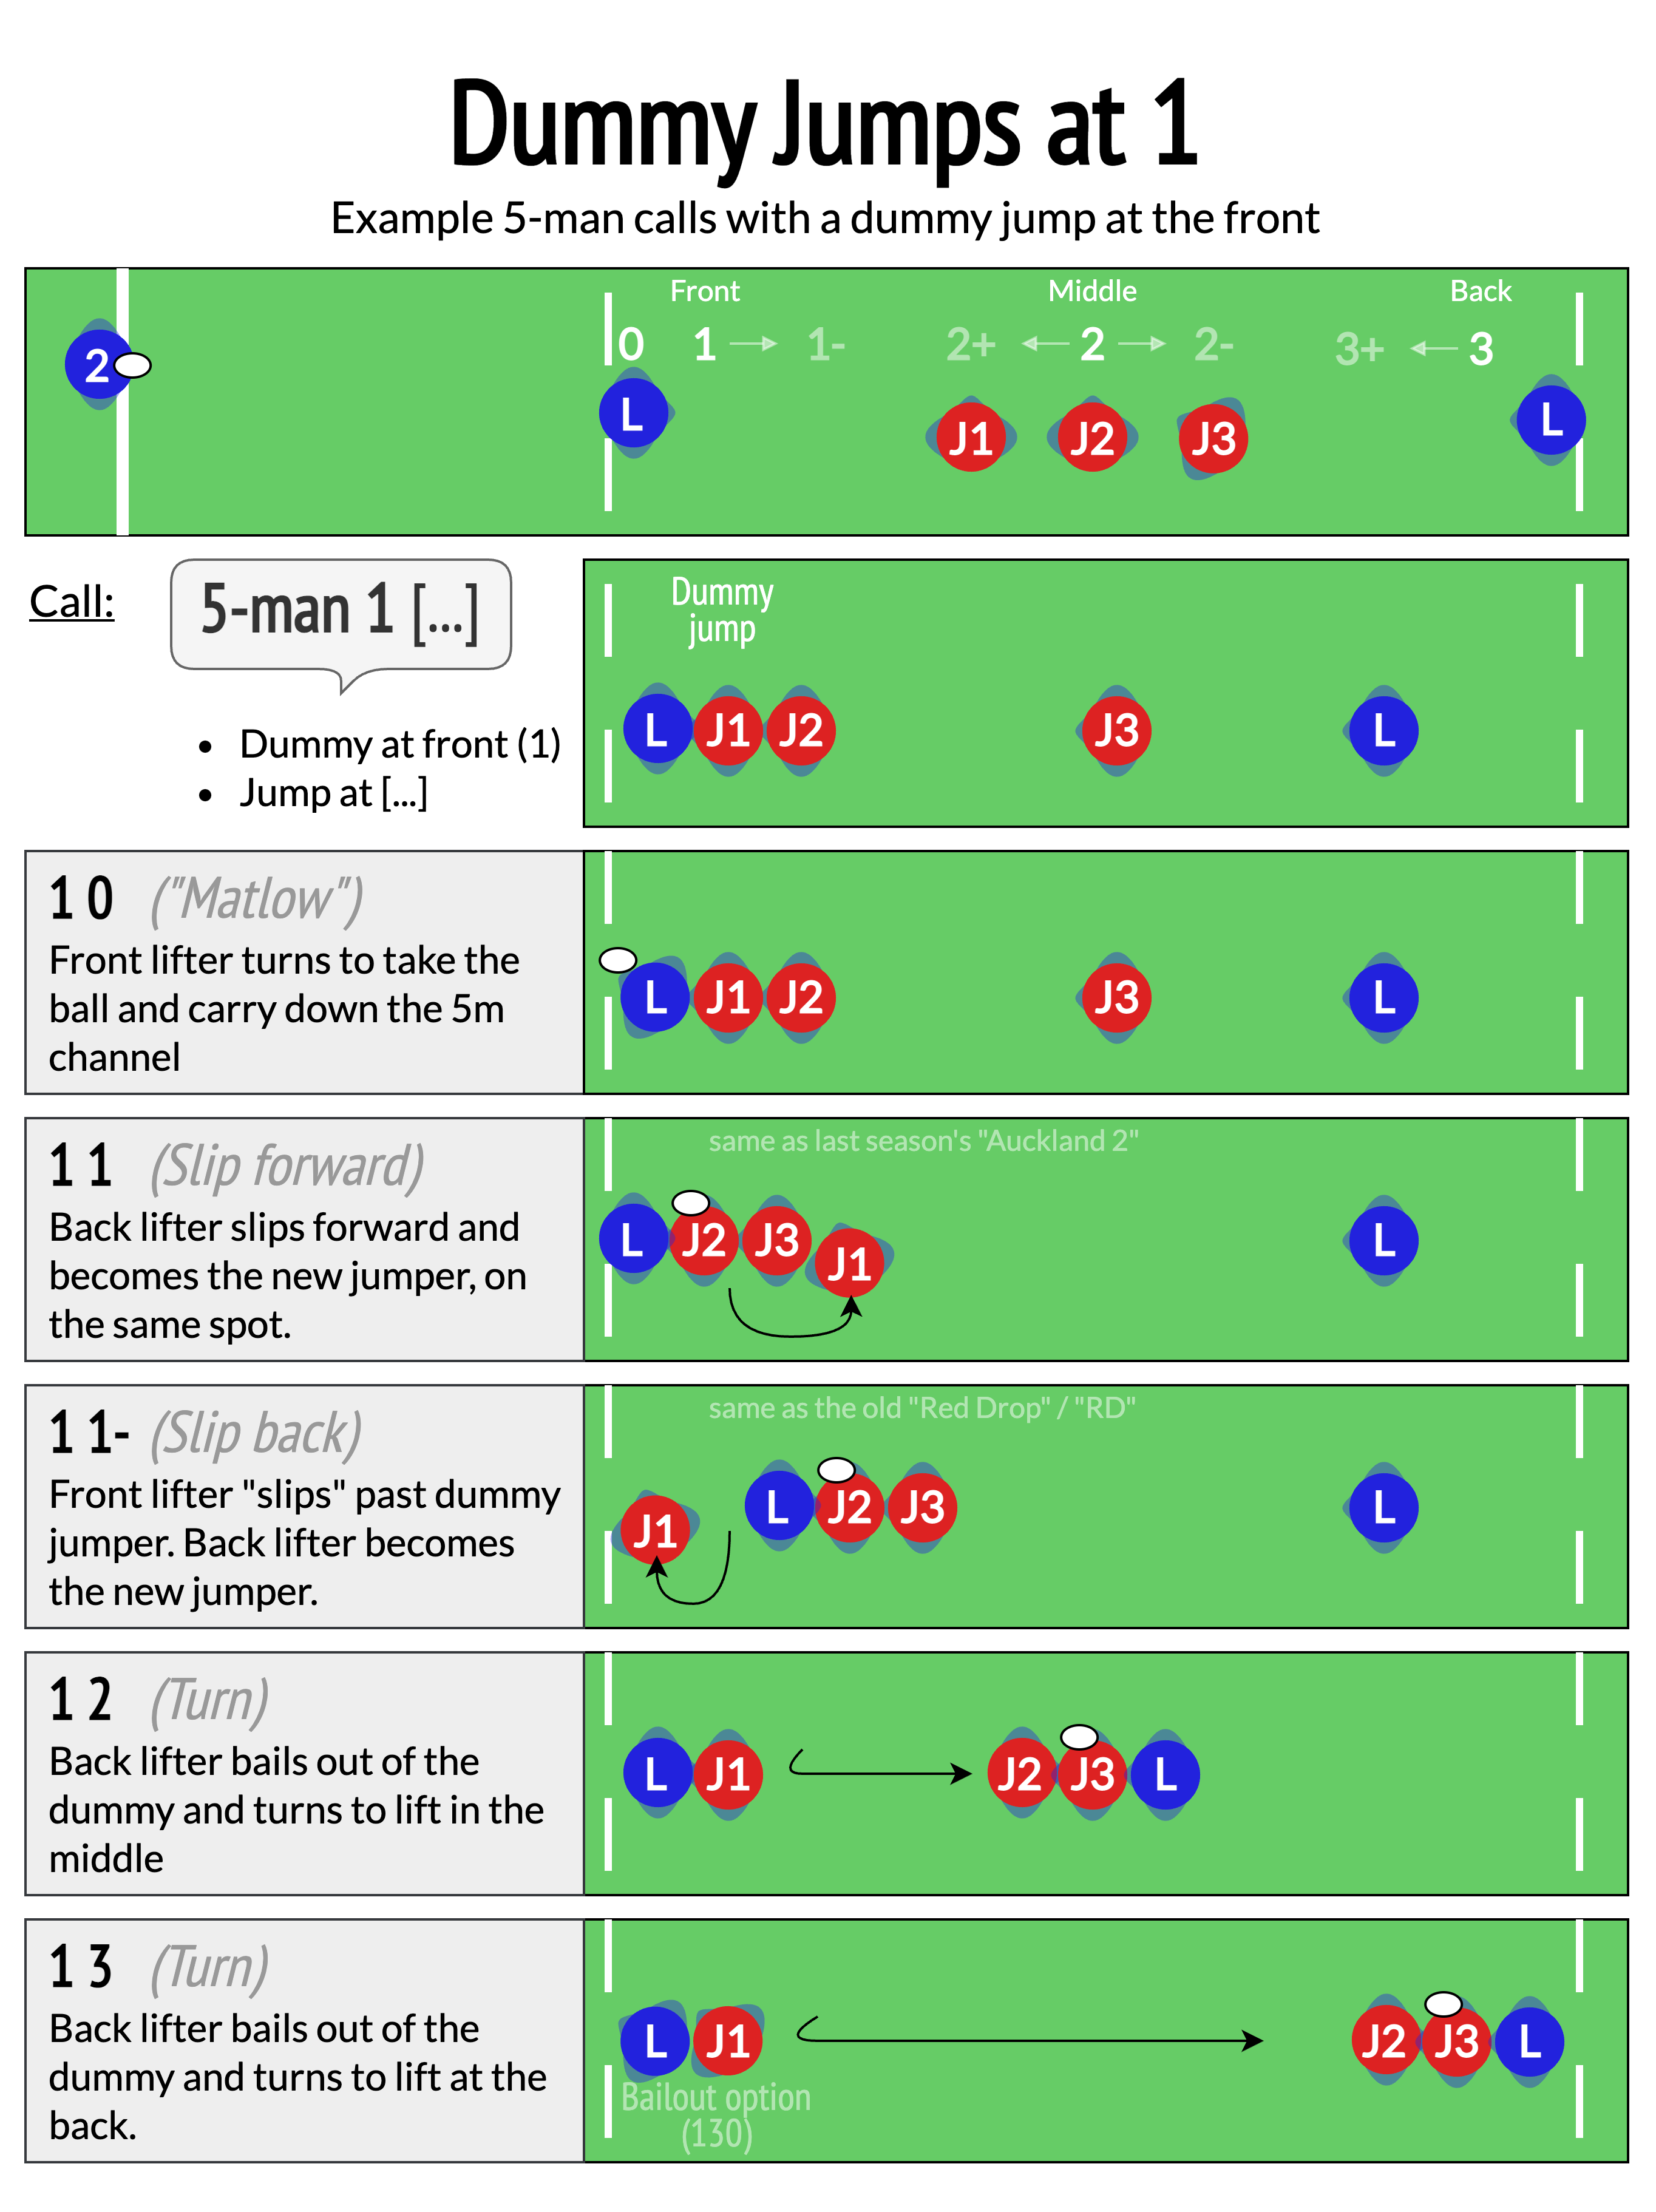
To mislead the defence, we use dummy jumps. Call two numbers in sequence — the first is the dummy, the second is the real target.
Example
“1 2”
Dummy at the front (1), throw to middle (2). Similar to the old “RD”, or “Canterbury 3”.
5-man 1 [options]
Steps
We can call slight forward (“+”) or backward (“–”) movements to adjust pod position and beat tight marking.
Example
“2+”
Middle pod steps forward to gain position. Can still jump on “Bang” if needed.
Call examples
Click one of the below calls to show a diagram.
7-man (Squeeze) 1 1
5-man (Split) 3+
7-man (Squeeze) 1 2 0
4-man lineouts
Calls for a 4-man lineout are much simpler and less structured.
4-man animations
Bang
Yes

No
Plays

The final part of the lineout is how we play the ball once it has been secured. Broadly, this is split into two categories:
- Hot (give the ball to the backs)
- Cold (keep the ball in the forwards - set up a maul)
- Transfer - pass the ball down to another forward in the lineout to shift the initial point of contact for the maul
- Flyby - bring the ball to ground for a maul before the forward receiver peels off to carry
Hot
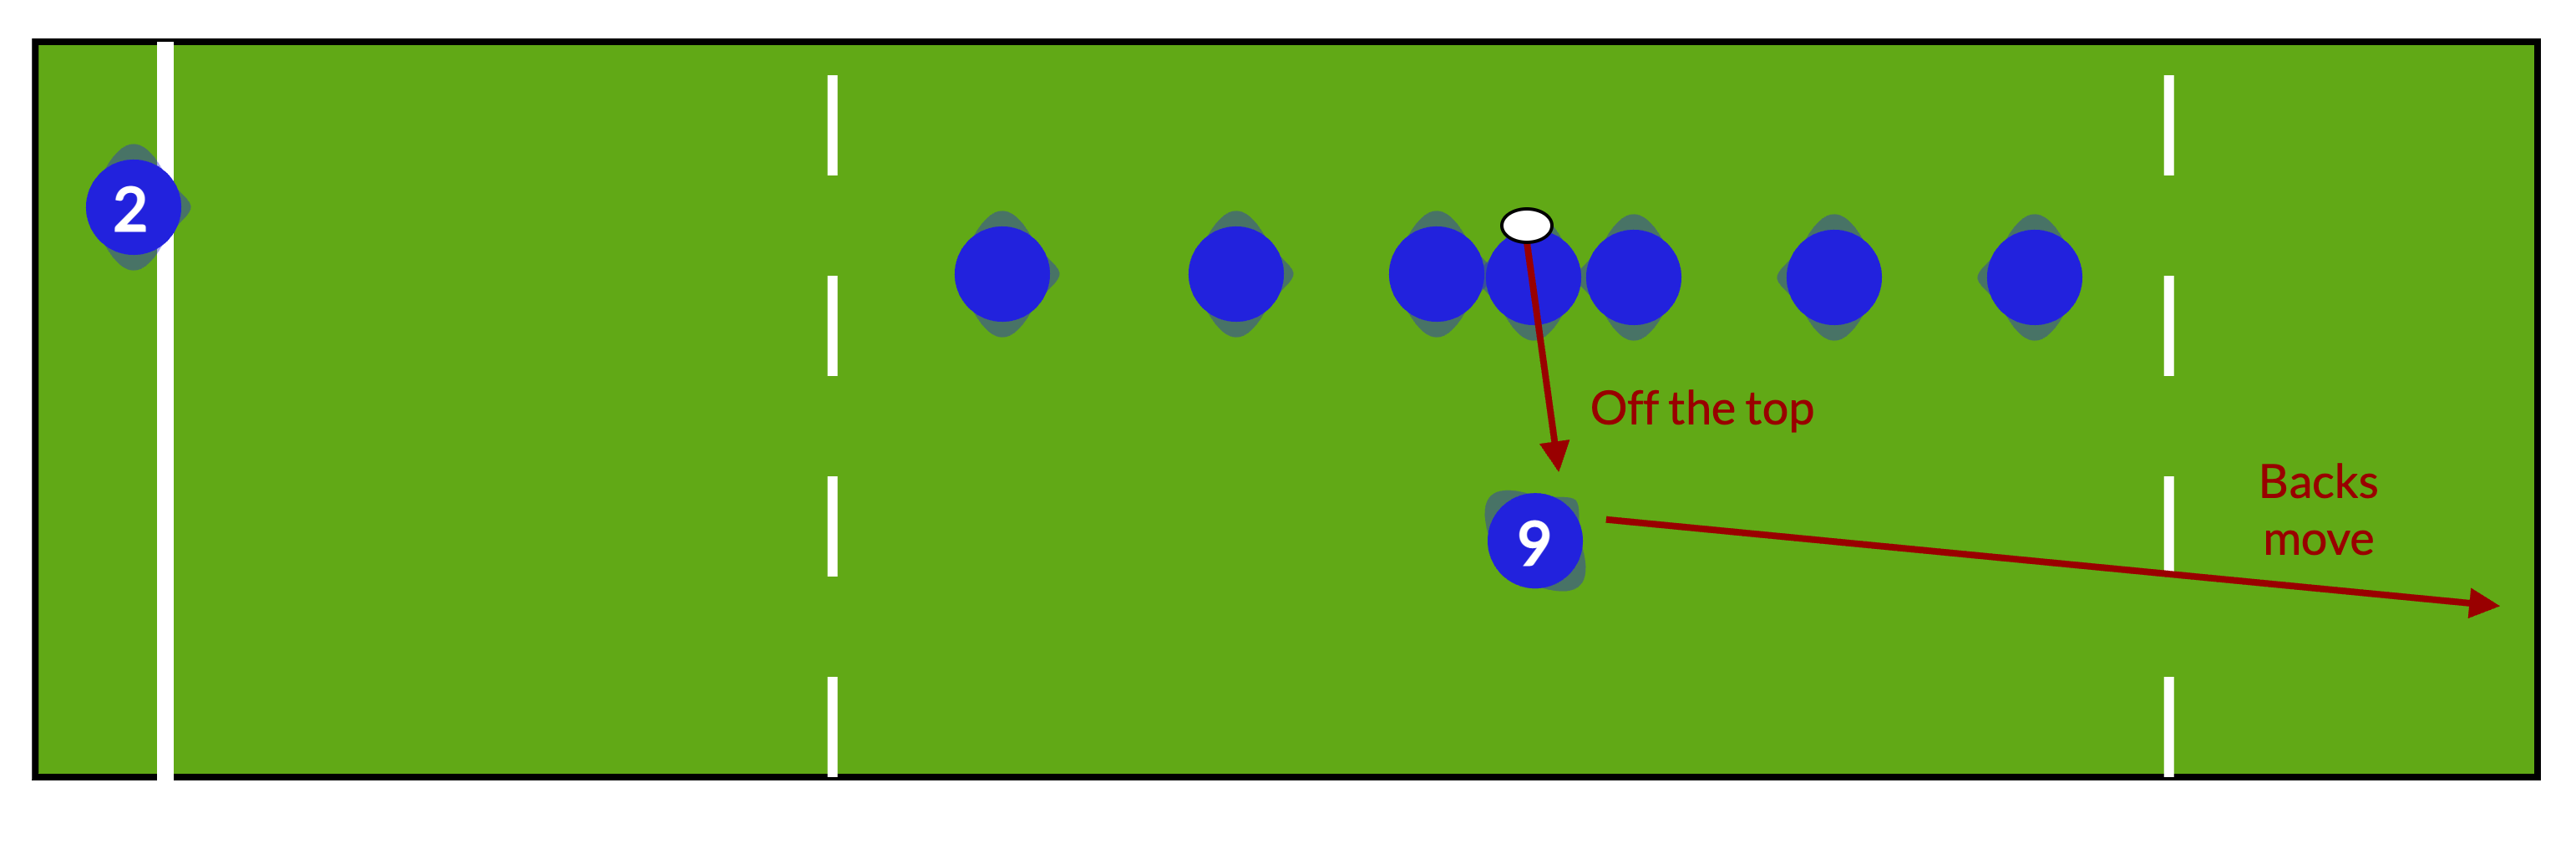
If the backs ask for a Hot ball, the jumper passes directly to the scrum half, who can play the ball as determined by the backs (e.g. a Backs Move or King or Queen off a short lineout).
Cold
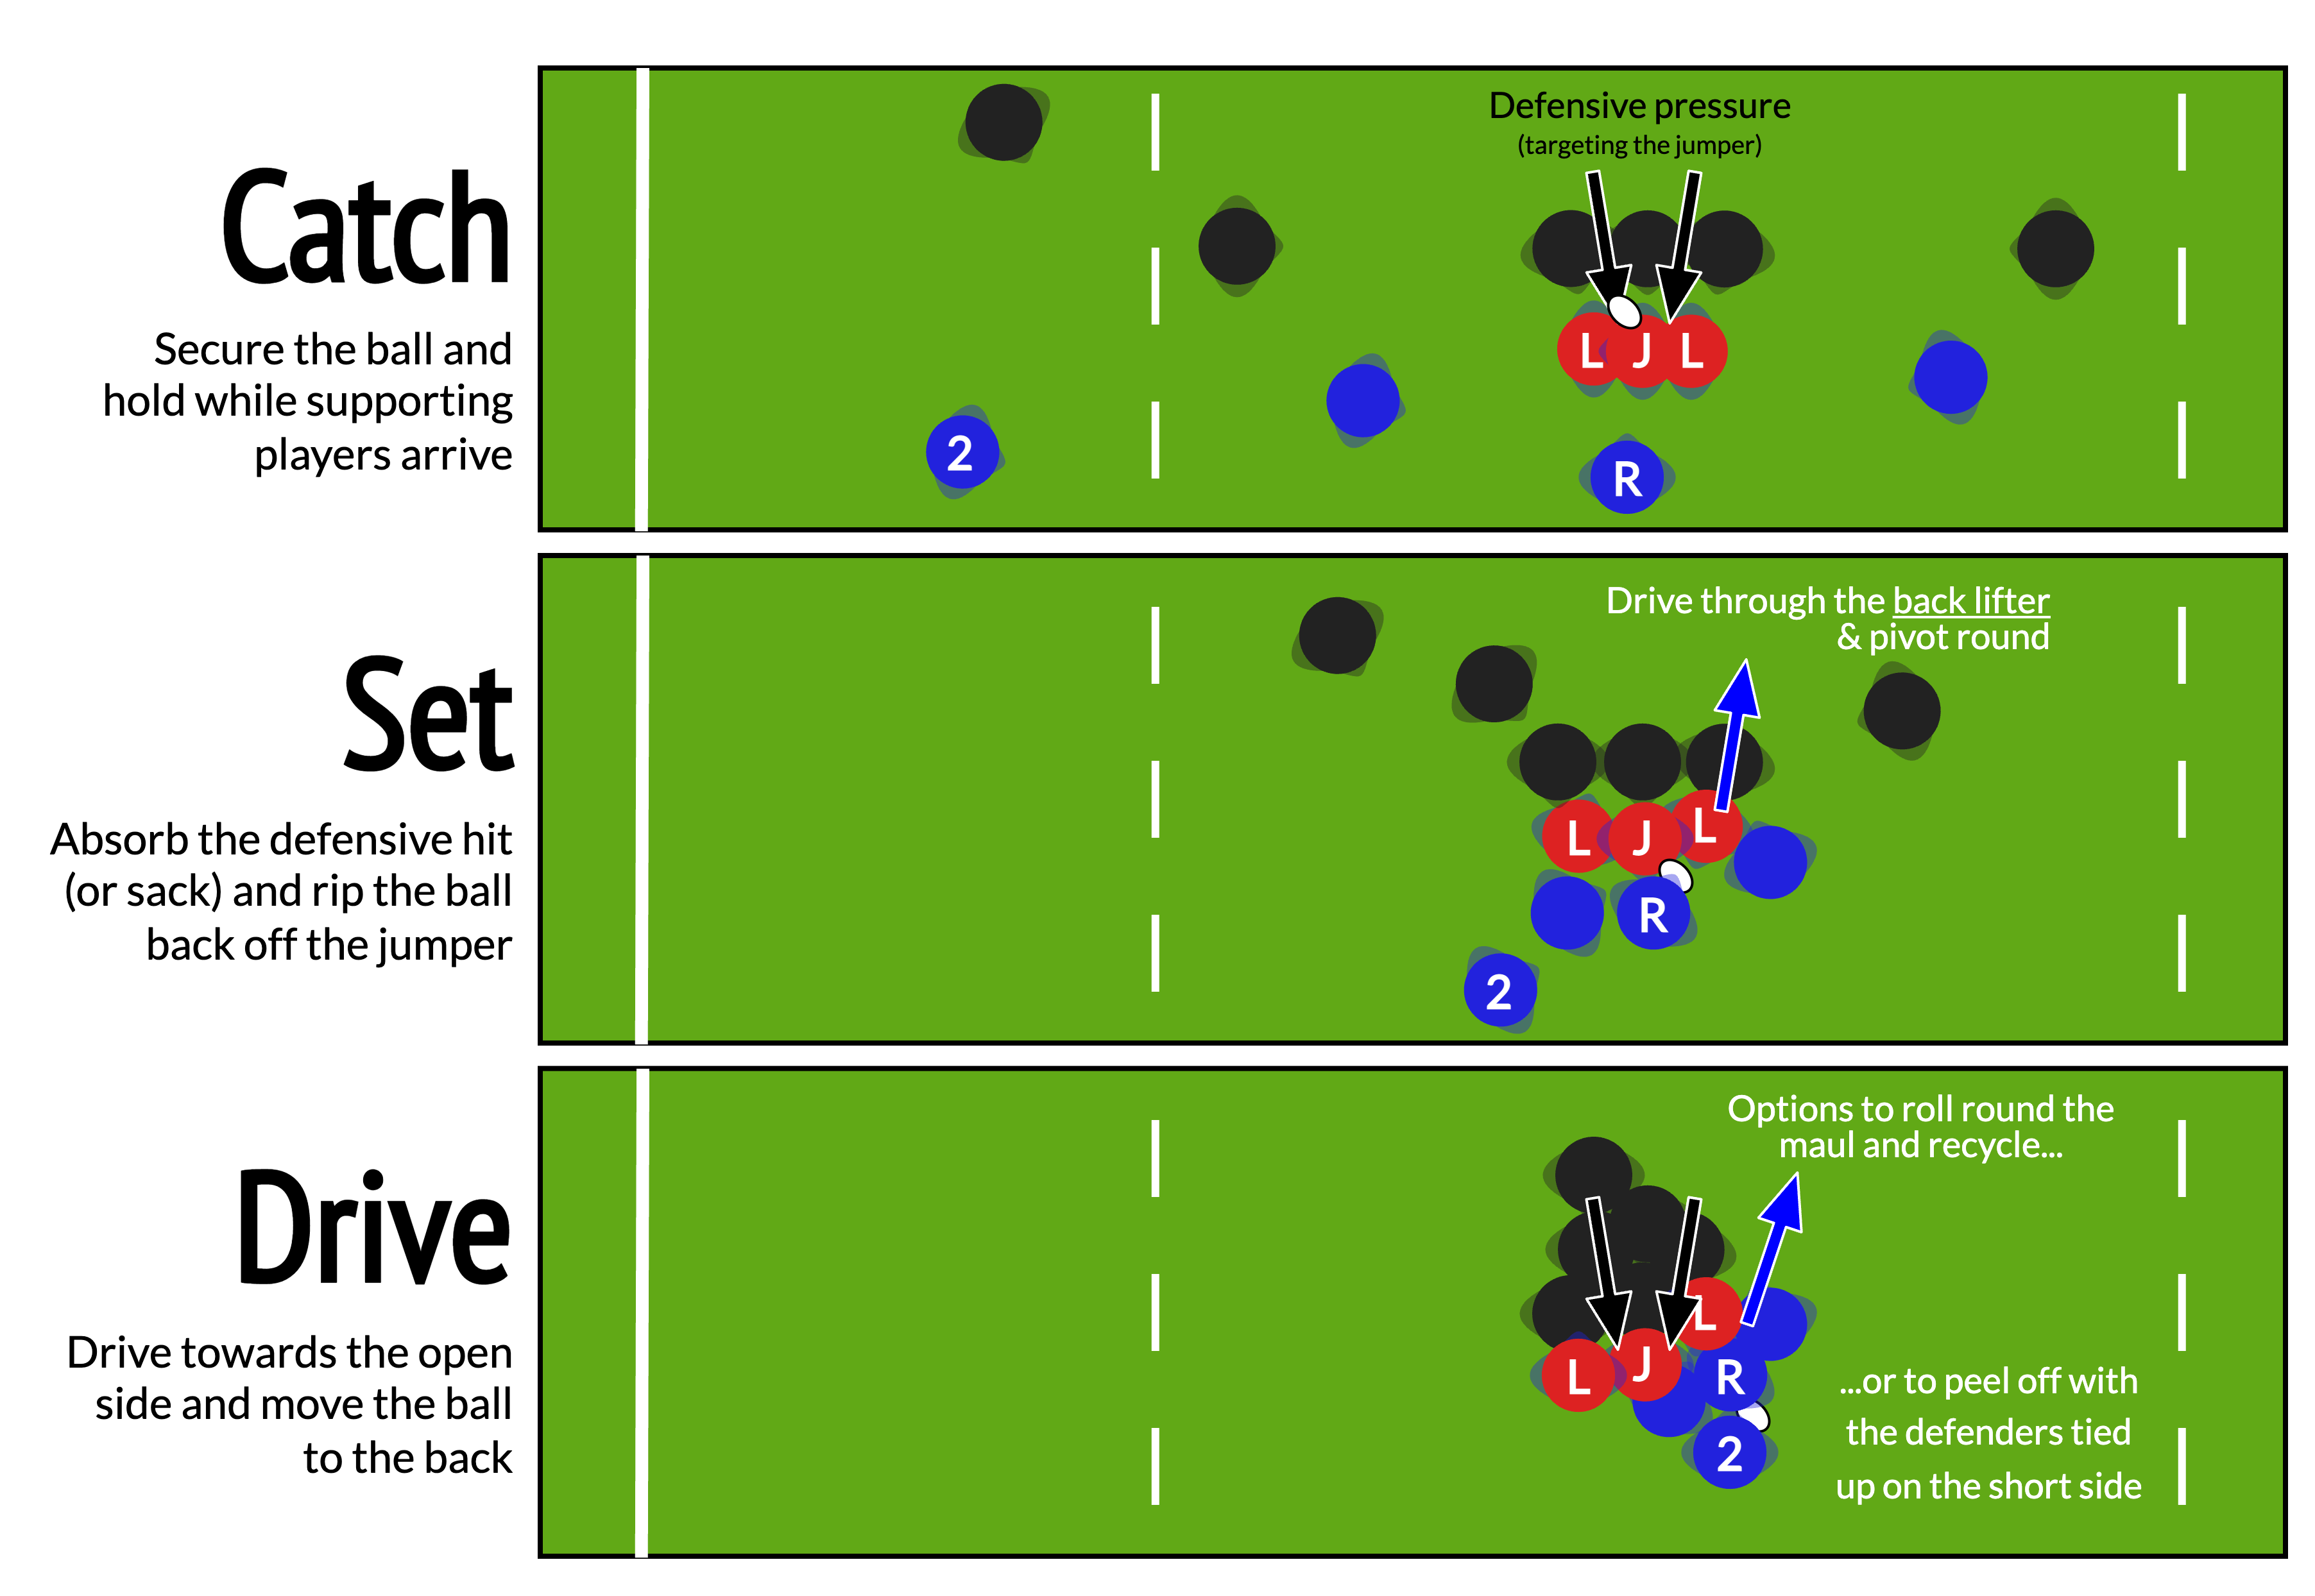
If the backs ask for a Cold ball, the standard option is for the jumper to be brought down to ground, and the forwards to set up a maul on that spot.

Note
The forward at the back of the maul acts effectively as a number 8 in a scrum (see Plays off scrum) so the scrum half may call a move.
These moves are not part of the lineout call
The jumper can also pass the ball down to another forward in the lineout to shift the initial point of contact for the maul (Transfer). This is useful if the defence is expecting a maul to be set up in a particular place, or if the jumper is being closely marked, allowing us to initiate the drive in a weaker defensive position.
7-man (Squeeze) 1 Transfer
Maul setup
A maul (like a scrum) requires the whole pack to work together and push in the same direction. To make this simple, and to keep options open, we want to wheel the maul by focussing our drive on the back lifter, opening up the space for the scrum half to pass to the backs, or to recycle or carry the ball.
Flyby
With the same setup as a Cold ball, the jumper can bring the ball to ground, but for another forward to peel off and carry (see Plays off scrum).
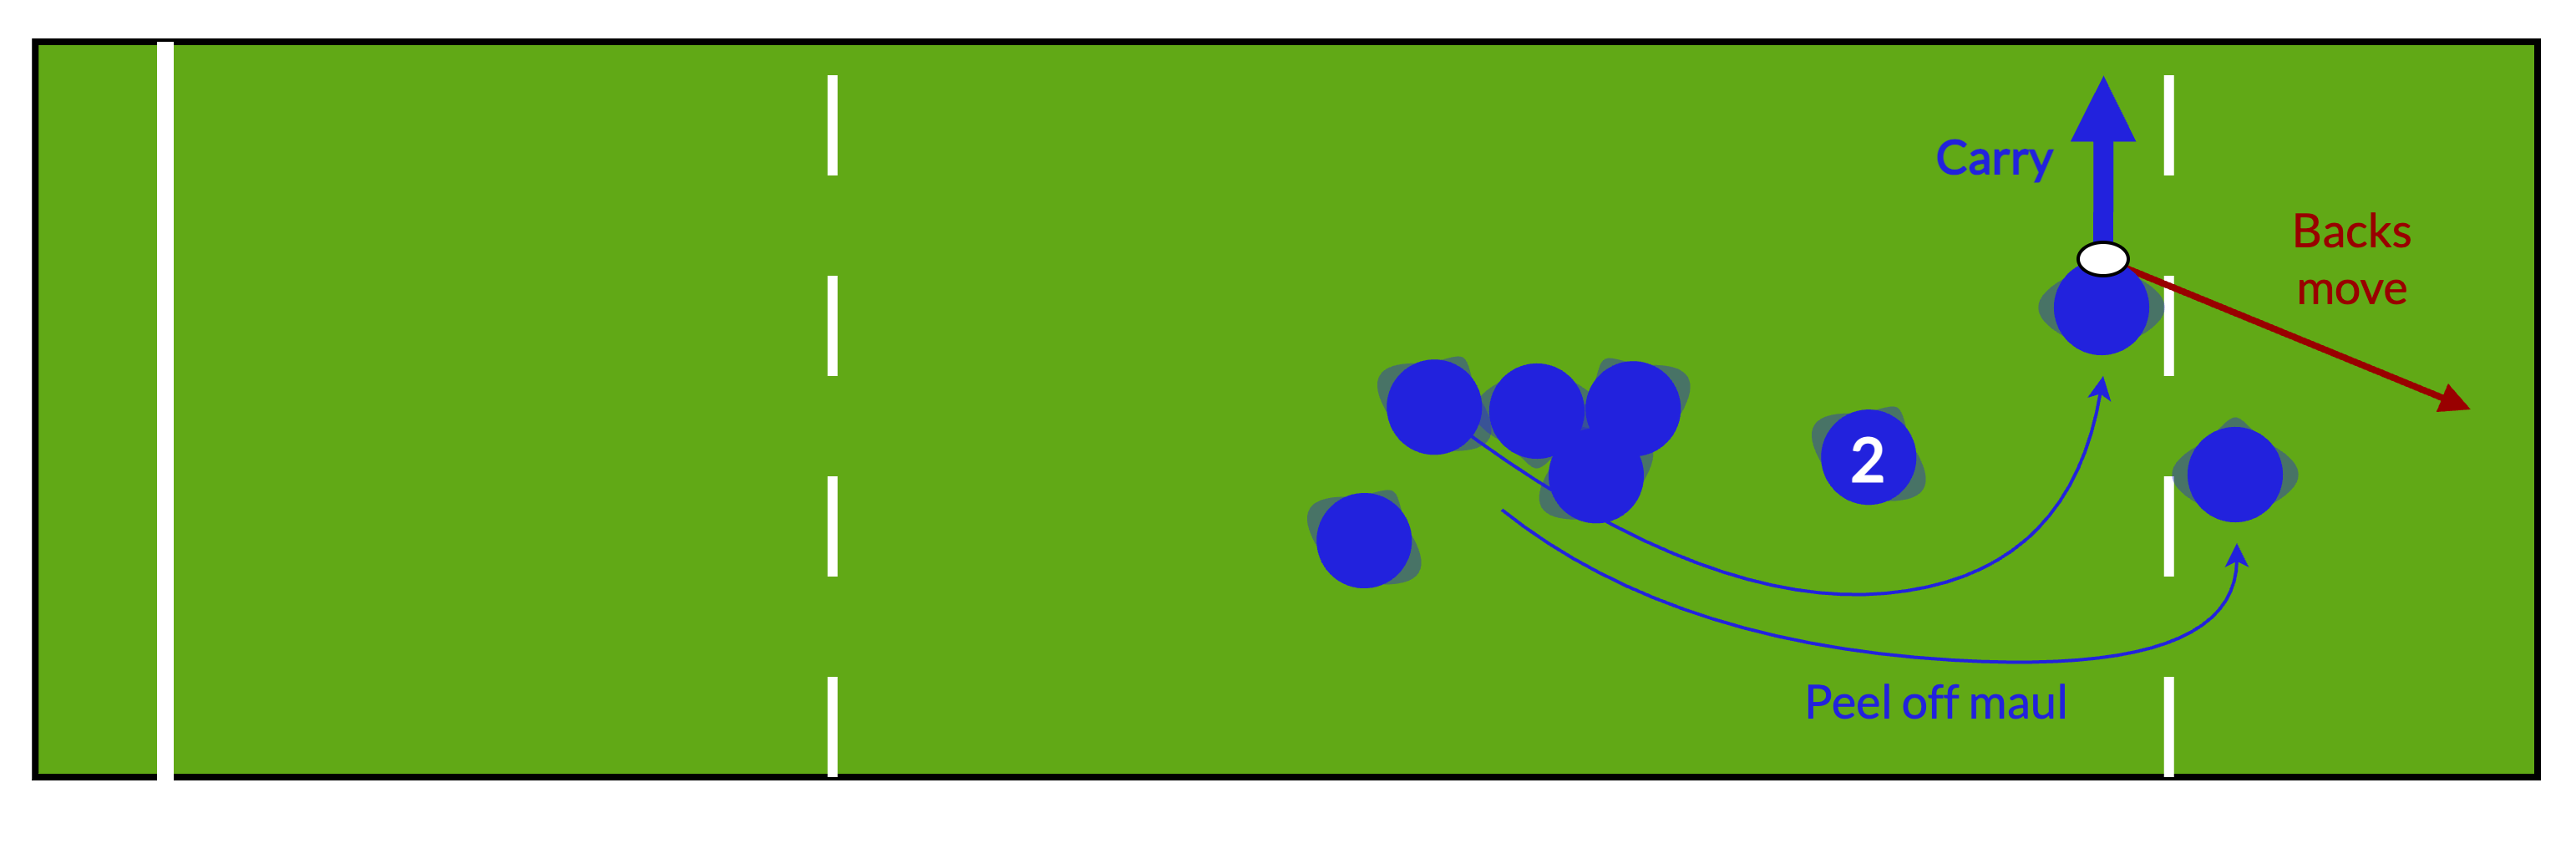
For simplicity, the ball carrier should expect to pass to the 9 (i.e. ♣️ Clubs or ♦️ Diamonds), but other forwards in the lineout should follow the play and be ready to support the ball carrier.
Note
Flyby is a forward-led play, but requires the backs to be expecting it so they can be ready to run their lines off the ball carrier peeling off, so it’s not strictly a Hot or Cold play.
Only run it when the backs have asked for it (or been told to expect it)
Short lineouts
If Hot is called, a short lineout leaves 2 or 3 forwards to be used in the back line.
For Cold lineouts, we need one of those extra forwards in the receiver (scrum half) position, because there are fewer unused forwards ready to support the lifting pod.
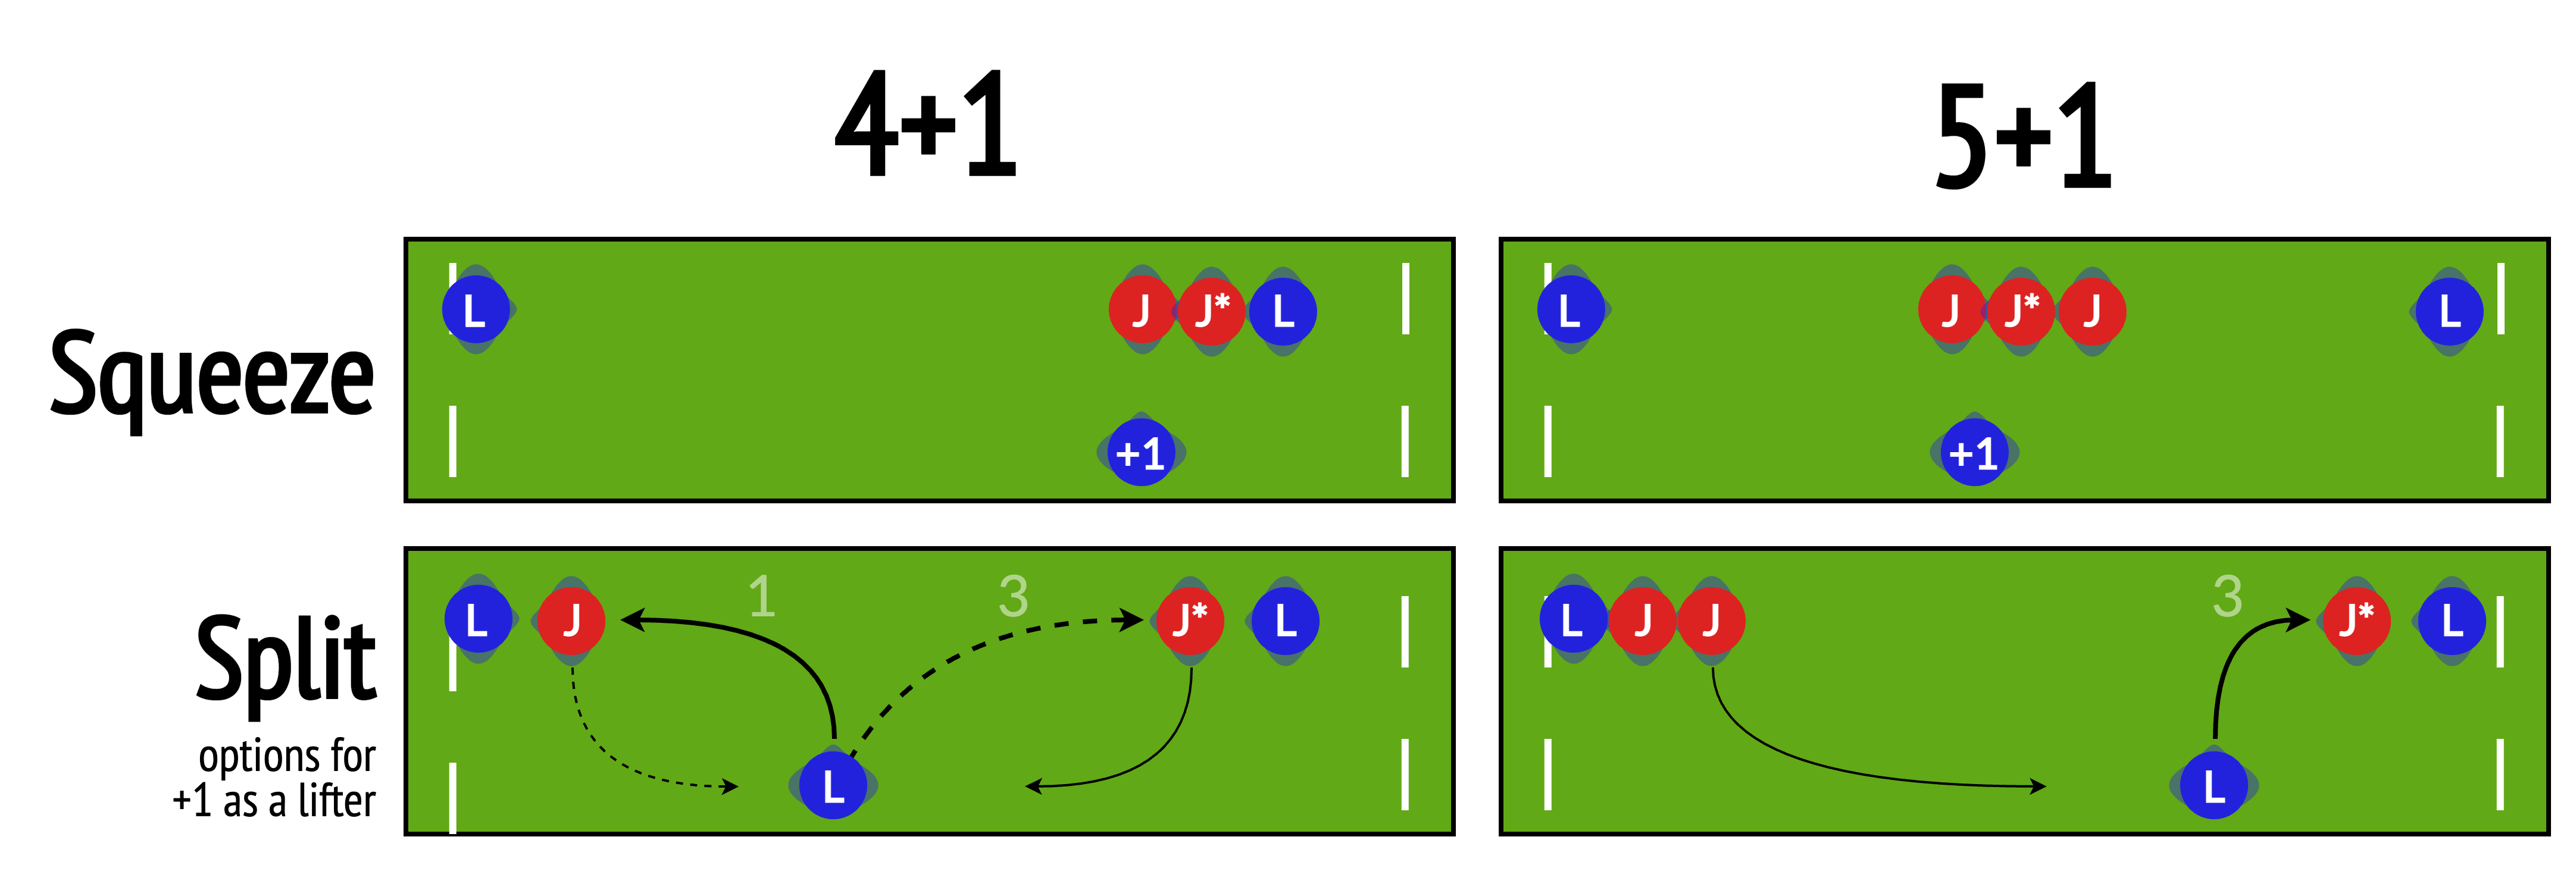
This “+1” player can also unlock some more complex movements, particularly using the Split formation to challenge the defence.
-
Or back pod in the case of the 4-man version. ↩